
Music reviews
&
helpful information about recording and mixing techniques. Posts written by professional engineers and musicians.
Learn about the inside secrets that engineers at Shine On Studio use in their sessions. Become a mixmaster and impress the world with your knowledge of audio production.

External Hard Drives for Audio Production Recording & Mixing
Here are some SSD Hard Drive options for storing and backing up your Audio Production work. These drives work great with Ableton, Logic Pro, Pro Tools, Studio One and many other DAWs.
There are a lot of hard drive options out there and as technology advances, the options keep getting better and better. The main thing to consider is the transfer rate that will send information back and forth to your computer. Most DAWs require a drive that rotates at a minimum 7200 rpm for audio. Of all the dries that the studio has used over the years. Glyph has been the one that outshines them all. We started with those Glyph Key hot-swappable drives that were easy to move from studio to home and be able to take our work with us to keep ahead of deadlines. Now everything is much more streamlined. The Blackbox series from Glyph has been rock solid for us over the past few years. The rotating drives offer a lot of storage for a very reasonable price. You can snag up to 10TB for under $330. That’s a lot of storage space! The 2TB option is listed here and is a great starting point for any engineer.
If you want to up your game a bit, you should look at Solid State Drives. These rugged drives do not have a rotating disc, but instead have flash memory that can be recalled instantly. The price point on these SSD drives is a bit more because of the new technology, but they are worth every penny. This 1TB model is very slim and slender and travels quite well. We have one that goes with the mobile recording setup and it has performed admirably. Priced at $199.95, this drive is affordable for the amount of time you will save on your workflow. If you need to move your setup on a regular basis, I would suggest that you consider the SSD version. You will have a rugged drive that can take a few bangs and jolts and keep performing at the level any professional demands.

The Black Friday Blackhole of Deals
There are a lot of good deals out there this year. I’ve found a few that are great options for almost any studio setup. Open up this blog post to see details and links to these deals.
As the biggest shopping day is now upon us, I urge all students to take caution in what you purchase. Your studio and software toolbox is going to continue to grow and it should. Just keep in mind that you shouldn't spend your entire bank account on gear that you may not use right away. It's good to build up your studio over time and get familiar with what you add to your studio so that you can be efficient with your tools. It's a good idea to take the time to learn what you have in your studio and become a wizard using your tools.
Tell me what you're looking to buy. I'm always interested in what has your attention right now and what you think will improve your workflow and overall production.
Here are some really affordable options that I would recommend that will not break the bank and add some very useful tools to your studio.
PSP is one of the plugin companies that may not be familiar to you, but they have some great plugins. The NEX reverb and the HertzRider are currently on sale for $20.
The new releases from iZotope are tools that will improve any workflow.
Flux Pure Limiter is on sale for $39 and is a great limiter to use on individual tracks and your master bus.
Looking for some great video editing software that is affordable? Check out FILMORA from Wondershare.
Sonnox is offering 50% off most of their software. Now is a great time to go grab that Inflator plugin.
Plugin Boutique is offering some great deals + iZotope Nectar Elements for free with any purchase.
I'm sure you will get some great deals this weekend. Just be sure you have some cash left in your pocket to pay the bills.
Gain Staging
Advice on how to make good use of the meters in your DAW and learn how to properly read them.
Getting the right levels in your mix is the very first part of the recording process. Paying attention to your input levels can pay dividends when it comes to the mixing process. Proper levels will yield a much more streamlined workflow when it comes to sitting down to mix.
So you maybe asking yourself, “What are the proper levels that I should be trying to achieve?“
The answer to this question can vary. You have to have a vision for the end result. If you don’t have that vision, then you should focus on getting levels that optimize your A/D converters. Most interfaces are calibrated for a sweet spot around -20dBFS to -16dBFS. Hitting this area as your target RMS level will almost always give you ideal tracks to mix.
Now if you’re sitting there scratching your head and not quite sure what all that means, don’t worry. Here’s a good rule of thumb to follow. Most meters in DAWs have a color coded display. Typically green is at the bottom followed by yellow, orange, and red. If you get your average level to hover right around where the green and yellow meet, then you’re in the ballpark. This means the middle point between your peak levels and your noise floor is close to that point where the meter changes colors.
Now of course it depends on what you’re recording. Different types of sound sources are going to give you different levels. Drums are going to have very sharp attacks that will yield higher peaks. Where as a vocal that isn’t too dynamic may just hover in the same area with little movement. One of the biggest problems that I see other engineers make is the level of their monitoring. Having your monitors up too loud or down to quiet will not truly give you a representation of the signal level. This is why you have to trust the meters and your DAW and let them show you what is actually happening with you levels. These are just pretty lights for you to look at while you’re working on your tracks. These are useful tools that can mean the difference between a good or bad mix.
It’s always a good idea to leave yourself some headroom when you’re tracking. You will want to have some space to mix and that is virtually impossible when your input levels hit -3dBFS or higher. Just be reasonable when you set your levels and keep in mind that you will be blending multiple tracks to mix down to your final print track.
NAMM 2019
Some thought and highlights from the 2019 NAMM convention in Anaheim, CA.
It was another great year attending the NAMM convention in Anaheim. This year I focused on making some new connections and getting to know more about the industry. I met many talented musicians and innovative thinkers. Yet, the information available was what really refueled my passion for recording and mixing.

Tony Maserati - NAMM 2019
I heard some great lectures by Tony Maserati, Fab DuPont, and Jacquire King, just to name a few. Taking mixes and letting them take on a life of their own seemed to be the universal theme from many of these talented engineers. Using parallel aux tracks to blend layers of textures was a reassuring message since that is how I do many of my layering techniques. What I found the most interesting was how each of these pros set up their EQ and compression chains. Seeing and hearing how they shaped sound has really opened my thinking about how to approach a mix.
I’m going to be spending a lot of my free time to practice some of these techniques and start developing some new signal chains. This will create a new sound for all of my mixes that will benefit every client at the studio.
Among the many things to see, experience, and hear at the NAMM convention, I also spent some time listening to the educational talks that where happening at NAMM U. I’d love to share some of the ideas and techniques that were discussed at these lectures. Set ups some time to come by the studio and we can engage in a discussion that will definitely help you get a better understanding of the music industry and how it can be integrated into your marketing and social networks.
High and Low Pass Filters on Vocals
EQ settings for vocals sometimes feels like you’re trying to find buried treasure. An endless task of moving knobs and listening to the changes just seems overwhelming. Then comes the conversation about filters on vocals that almost always arises in every session.
EQ settings for vocals sometimes feels like you’re trying to find buried treasure. An endless task of moving knobs and listening to the changes just seems overwhelming. Then comes the conversation about filters on vocals that almost always arises in every session.
There are a few things you can do to improve your vocal recordings and get them to sit in a mix. The first is using filters on your EQ to tighten up the high and low end spectrum. Filters on most EQ plugins have 3 main settings.
On/Off
Frequency
Curve/Slope
The first is obvious, so moving on to the second. Frequency is the point where the filter starts to engage. This is the point in the EQ spectrum where the audio is starting to be lowered or attenuated. On a High-Pass Filter (HPF) you are allowing the high frequencies to pass as you filter out the low frequencies. On a Low-Pass Filter (LPF) you are allowing the low frequencies to pass as you filter out the high frequencies. When these are used properly, you can clean up a recording to focus on the audio spectrum that you do want in the mix.

Brainworx bx_hybrid V2
For example, when you set your HPF to 50Hz it is only starting to attenuate the frequencies at that point. How much attenuation is based on the third parameter, the curve or slope. This is measured in dB octaves that are listed as 6dB, 12dB, 18dB, 24dB, and 30dB. These are referred to as ordered harmonics and a 6dB curve is a 1st order harmonic. This means that the signal level drops 6dB per octave. A second order harmonic is a 12dB slope and the signal drops 12dB per octave. The higher the slope the more severe the drop in audio signal becomes and approaches a “brick-wall” response, which is not usually favorable to your audio signal.
For vocals I like to use a 12dB slope for both the HPF and the LPF. Sometimes I’ll use a different setting if the mix needs some tweaking. For the HPF I typically start around 80Hz and then adjust the frequency based on the tone of the vocalist and the style of the music. It does take some time to train your ears to recognize the sound that you want for a mix. I don’t recommend making these changes with the track in solo mode. It’s better to have your track in the mix and listen to how the EQ adjustments affect your track and mix. Using a HPF correctly can help cut down on the rumble in a vocal track and tame some of the plosives that may happen if your vocalist is too close to the mic.
The LPF on vocals can be a bit more difficult to dial in. In many cases, the vocal spectrum in the high frequencies is OK to leave in the mix. If you’re trying to cut down on sibilance, it’s best to use a de-esser. However, if you want to shape the vocal to reduce the amount of high frequencies it has in the mix then you can use a LPF to get the job done. I’ll usually start around 10kHz with a 12dB slope and then sweep the filter frequency up and down to find a spot that works for the mix. Rolling off these high frequencies can make more room in a mix for other instruments or backing vocal tracks. Depending on the arrangement of the music you can get a tighter sound by filtering out these higher vocal frequencies.
For more info and visual tutorials, check out my audio mixing master class.

Working on the mix
Get some insight on how the pros prepare for a mixing session.
Today's blog entry is just about getting yourself in the right mind frame for mixing. Focus is essential and that comes with proper rest. Your mind, body, and ears should be well-rested before starting on your mix. When you take fatigue out of the equation, your mix will have a sense of power and intensity.
Getting setup for a session at Shine On Studio
As you start your mix, it can be a good idea to align yourself to a reference track. Give your ears some time to adjust to a mix that has a similar energy. Absorb the sound from the reference track to put you on the right path for your own mix. This will map out the focus you need to start your mix.
I personally like to start mixing at a lower volume on my monitors. This allows me to challenge my ears and focus on the pieces of the music that need to be the foundation of the mix. These core elements are the source of energy that puts the music into motion. Once you have all of these elements in the right place, the rest of the mix can be layered with the accent sounds.
The mixing work you do may take some time. Give yourself the time needed to make wise decisions. You can change your mind about the mix and that is part of the journey. A good mix is one that has been given the proper amount of attention. It is OK to take breaks to restore your energy and get your focus back on track. You can take the time you need and sometimes what you need to do is step back for a while and review what you've done with the mix.
Procrastination and anxiety are not your friends. It's a good idea to keep them out of your routine when working on a mix. You do want to stay in contact with your client throughout the progress of your mix. If you're making reference copies to review, share them with your client for feedback. Sometimes they may like an aspect you are considering to revise. Remember that this is their music, so you want them to be pleased with the final decisions.
I hope these words encourage and guide you to be a good mix engineer. Just remember that it takes time to craft a masterpiece.
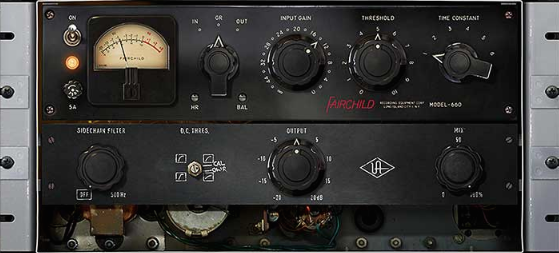
UAD vs. Native Plugins
Two options that could make a big difference in your workflow and your wallet. Let’s look at some of the main similarities and differences between the two platforms.
Everyone is in the plugin business these days. It’s the modern way to work on audio production that has embraced the digital world. With so many options for plugins, there are some things to consider before you blow your kid’s inheritance on software. First thing is what DAW to choose and that should also go with what plugins are included with that DAW. Most of the DAWs out on the market all come with a decent set of stock plugins. So you have to consider if those stock plugins will be sufficient to get you going and give you the tools you need to start mixing the way you want. Now if you feel that you need to add to your toolbox and get some additional plugins to fine tune your mixing there are a few things to keep in mind. All the plugin companies have formats that should be compatible with most of the big DAWs, so you have quite a few options.
UAD Fairchild Compressor
Focus on plugs that give you something that you don’t already have in your system. Mainly a new tool that will enhance your mixes and give you the control you need to shape the mix. Compressors are bountiful and there are many different types out on the market. What do you need that you don’t already have? More color? Better transient control? The best way to find out is demo a few plugins and see if they give you the edge that you need. Most of the plugin companies will offer a trial period, which is exactly what you should do before investing. Even if you watch a video or someone tells you that you should buy a plugin, I always recommend running it through the trial period to give yourself some time to find out if it’s what you need.
Most companies offer native plugins. These are plugins that work with the DSP processing power of your computer. They’re great because you don’t need any extra hardware to run them. The only limitation is the processing power of your computer. One of my favorite native plugin companies is Plugin Alliance. These plugins are modeled emulations of some great pieces of gear and they sound great. The audio quality is clear and gives you the sound that your mixes need.
Now if your computer doesn’t have the power to run these native plugins, you can look into getting a UAD system that provides the DSP processing for your plugins. Universal Audio has a line of interfaces and satellite boxes that allow you to run the UAD plugins. The Apollo system has many options and price points and this makes them a good option for any studio setup.
You can get the same plugin on both UAD and Native platforms. So do you need to have both versions? I’d only say yes if you need to delegate your DSP processing. I’ve used both platforms and I don’t notice any big differences between the sound. I’ve done null tests on the plugins and they cancel out when the phase is inverted. The main difference is the way the plugins run on the system and the price. UAD is a bit more expensive, but does free up the DSP on your computer for other plugins and processing.
I recently asked a question on the Plugin Alliance forum to find out how everyone felt about the differences between Native and UAD plugins. You can read the comments here.
If you have anything to add to this discussion, please leave a comment.

Recording Hip Hop Vocals Tips and Techniques
Getting ready for a big studio session? Then you will want to prepare for giving your best performance on the mic. Knowing what to expect and making sure that you get the most out of your studio time is essential to making a great album. Here are some tips and things to consider before you step into the studio.
Vocals are the core of Hip Hop and recording them can be the make or break moment. All Hip Hop artists that come to record at Shine On Studio are looking for "clean" vocals that have transparent clarity and rich tone. Now, how do you capture these vocals to produce the next big hit song? There are a few steps that are crucial to the success of the track and they need to be taken care of before arriving at the studio.
First, the throat needs to be in good shape. This means no drinking cold fluids before coming to the studio. The iced coffee and 7-Eleven Slurpee are an absolute deal breaker. A cold throat is constricted and cannot provide the quality vocals that are needed on a hip hop track. Room temperature water or hot tea are a good idea to relax the throat and keep in loose for the performance. If your suffering from a cold or allergies, honey is a good way to soothe the throat and prep it for the session.
Second, warm up before the session. Just as athletes stretch and get loose before a game, vocalist need to warm up their voice before a performance. Recording is a permanent process and once the recording is complete, it is etched in stone for all time. When fans are going to listen to your recording over and over for the rest of time, it is a good idea to make sure you put your best performance on the tracks.
Writing your lyrics down is a good idea, but rustling papers in the vocal booth is a really bad idea. Here at Shine On, we've installed a magnetic board in the vocal booth for vocalists to hang their lyrics up on the board to keep the papers still, but also easy to see. Music stands also work, but you don't want to be looking down while singing, so a magnetic board or a cork board at eye-level is a really easy way to keep the head up and the throat straight.
Headphones are really important and the right pair can improve a vocal performance. It's good to have closed headphones that go over the ear to keep the bleed to a minimum. There are many types of headphones out on the market, but closed headphones work the best for tracking vocals. The Shure SRH840 headphones are a good choice for quality and performance at an affordable price.
These are just a few key tips and techniques that you should use when recording vocals. For more info on getting quality recordings, contact the studio staff.
Podcasting 101 - How to start up a Podcast
Podcasting is a great way to sharpen your audio production skills. You have opinions and podcasting is the perfect way to convey your thoughts in an engaging media. Here are some ideas and options for gear to get your podcasting career heading in the right direction. Click on the post title to view the entire article.
You have an idea or a topic that you want to discuss and now you've decided to turn it into a podcast. Good idea! Now where do you start? Let me get you started on the right path to becoming a successful podcaster.
Start with a script or an outline of the topics and points that you'd like to cover. It doesn't have to be verbatim text that you plan to record, but there should be some main topics with some additional notes or ideas that will help you keep the conversation flowing. It may be good to emphasize a few points as a review, but try not to repeat yourself. There's nothing more boring than listening to someone talk about the same thing over and over without implementing new ideas as they go along. Keep it moving and keep the listeners interested in the topic.
OK, now you have your ideas written down and you're ready to record. But wait, you don't have a microphone. Not to worry, you probably have a smartphone, right? If so, you have a handy little recorded right in your pocket. Now the audio quality might not be stellar, but it is a place to start. You want to try and get the best recording quality that you can and most modern smartphones do a decent job of recording voices. I'd suggest that you find a quiet spot to cut down on the ambient noise and maybe use the headphone cord with the built in mic to keep your sound consistent. Plus, the earbuds will serve as your monitors.
So maybe you're not thrilled with the idea of recording on your phone. Not to worry, there are some options that will get you going and not break the bank.

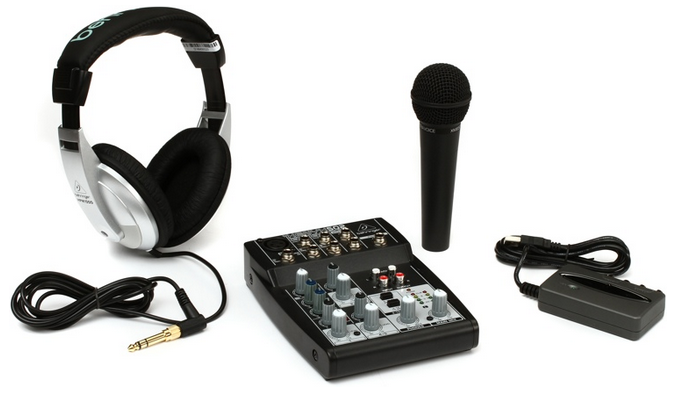
Behringer Podcast Studio Package
If you're on a tight budget, but still want to get a decent setup for your podcasting, you're in luck. Behringer has a podcasting package ($99.99) that includes a mic, mic cable, mini mixer, headphones, tripod, and some accessories to get you everything you need to be the podcast star you're destined to become. This Podcast Studio will give you the ability to record your voice and also patch in some audio devices if you want to have music or sound effects added to your episodes. With this efficient setup, you'll be able to get a clean recording that will be professional and easy to control. There are not many packages out there that can compete with this one. The versatility of this setup will allow you to be creative, but also be mobile for those sessions where you want to hit the road.

Now if you're looking to be a little less complex with your setup and want to have something that is a little more plug-and-play, the BLUE YETI is a great option. This is a USB mic that allows you to just plug right into your computer and start recording. There is a headphone jack on the bottom of the mic that will allow you to monitor your recordings and also enjoy that sweet sultry voice of yours. This mic has a built in stand, so you're ready to go right out of the box. With all the controls right on the front of this mic, it's almost fool-proof. Now there is one bonus to this mic, it comes with the Presonus Studio One Artist software. This is excellent audio editing software that will take your production to a whole new level. Plus, you can use this software to compose your own music. You really strike gold with this mic if you're willing to put a little cash upfront. Now you'll need to purchase headphone or use your earbuds, but at $149.99, this package is well worth the investment.

The RODE PODCASTER is a really nice all-in-one USB package that gives you excellent quality for a reasonable price. ($229) This bad boy has a built in headphone amp that allows you to monitor your recording directly through the mic. The USB cable connects to your computer and viola! You are now ready to rock and roll with your podcast. You will need a mic stand for this smooth criminal, but not to fear, there are many great options.
In the world of podcast microphones, this one stands alone. The audio quality is quite nice and if you want that radio announcer sound for your voice, this is the mic for you.
Now that you're all buffed on where to start and how to get the audio recording going, it's time to start making your podcast. Be sure to use decent audio editing software and clean up your recordings. Trim off any coughs or dead air and keep the audio flowing. This will ensure that your audience keeps their focus on the content. It would also help to use some music that you have created in the segues and at the introduction of the podcast. Music can give you a more polished and professional sound, so try your hand at making some music.
Just as a footnote, be sure to give credit where it is due. If you research information, be sure to reference where you found the information and anyone that was involved with your podcast production. Karma is real and it will come around if you pay it forward.

The right amount of reverb for your vocals
Getting the right amount of Reverb on your tracks is never as easy as the professionals make it look. It does take a little bit of time to sit and listen to your levels. Here are some ideas for how you can dial in that reverb level and make it feel like part of the mix.

Reverb is that wondrous sound that can lift vocals to a new level and make a song come alive. With the right amount of mixing, reverb can be the tool that takes a song into the hearts of many fans.
The right amount is subjective, but it's a good idea to get a reference point by listening to some of your favorite songs. Try and hear how much reverb they used when producing the songs. Differentiate between reverb and other effects like delays and flangers. Envision how big the space is around the vocals. Measure how long it takes for the reverb to diffuse and fade away. Once you have a decent reference point, now you're ready to start adding reverb to your mix.
Keep the reference song(s) within easy reach as you start your mix. If your DAW allows multiple auxiliary tracks, create 3 or 4 tracks for multiple reverbs. Assign the vocal track sends to each of the different reverb aux tracks. On each of the aux tracks put a different instance of reverb. If you have multiple reverb plugins, put a different one on each aux track. If you only have one reverb plugin, put it on each aux track. Now go thru each reverb and set their parameters. Make the first one a plate reverb. The second can be a hall reverb with big reflections. The third can be a room reverb with a fast diffusion time. The fourth can be an ambient or chamber reverb that has some strange or unnatural settings. This will be our texture or icing on the cake aux track that give the vocal some depth and width.
Now you can start with one reverb and tweak it to hear how it mixes with the vocal and music. Go down the line and create a mix with each of the different reverbs. A/B each of the reverbs to hear how each one is creating a different space for the vocals. Tweak as needed and even try blending two, three, or four of the reverbs to create the right amount of space you're seeking. Many of my own mixes have two, three, four, and even five different reverb tracks running at the same time to add texture, depth, and resonance to the vocals. If one reverb works, that's all you need. When you want more, try blending a few different reverbs and set them up to enhance separate parts o the vocal track. Use automation to create volume swells or emphasis on different phrases.
Music needs to have motion to keep listeners engaged. Automating reverb and other auxiliary effects is a great way to keep a mix in motion. Try just a little bit at first and as you get more comfortable, go hog wild with your automation. It's always a good idea to "Save As" your session mixes so you can return to your original session if you want to revert for any reason. Heck, make 2 or 3 different mixes from scratch and then compare them side by side. If they sound similar, you may have a very distinct ear. If they're different, then you have multiple options to show your clients or fans and get their feedback.
Go have some fun with reverbs and mold your vocal tracks into the most amazing part of your mix.
Producing Music - Where to start
Producing is the construction of music. You have to make choices about the project as a whole and this will include things like EQ, panning, compression, lengths of the delay, when to delay, when to chop up the vocals, when to add guitar solos, how the song begins and ends, and everything else that happens in between. This is not an easy task, but it does have huge rewards that are long-lasting if you do it right.
Producing music is something that takes time to craft and comes with lots of experience. If you're one of the gifted few that can just produce w/o experience, you may still get some insight from this post.
Producing is the construction of music. You have to make choices about the project as a whole and this will include things like EQ, panning, compression, lengths of the delay, when to delay, when to chop up the vocals, when to add guitar solos, how the song begins and ends, and everything else that happens in between. This is not an easy task, but it does have huge rewards that are long-lasting if you do it right.
To achieve this goal, you need to do a bit of homework. Start by listening to some of your favorite music. Pay close attention to all the little details. Take notes on when each instrument comes into the mix and where it is panned in the stereo spectrum. Then pull apart the mix in small bits as you explore every aspect of the sound. A well-produced mix has many layers and when you examine each layer, you will understand how the producer constructed their masterpiece.
To keep you on the right track, start reading some books about producing that have been written by the masters. "Behind the Glass" is a great perspective of what it's like for producers working in the world's biggest studios with some of the most famous musicians. Gain some insight on what will be ahead of you before you cross that bridge.
Once you think that you have a good grasp on how to produce, go and find a small band that is just starting out and see if you can produce them. If you can produce a band that has very little experience in the studio, then you're ready to start your career as a producer. It is no easy task to work with musicians that have never worked with a producer. If you succeed, that is one of the most difficult hurdles to overcome. You've got a lot ahead of you and the rest will fall into place as you move along. You may not succeed right away. In fact, it will take time to get settled into the role. Keep plugging away at the challenges that arise and you will find ways to overcome them.
If you want to start even smaller, just try to produce one song on your own. Do some MIDI composing and get some samples together. See how long it takes for you to come up with the melody and rhythm. This will give yo some insight as to how long it will take when you work with other musicians on their production.

Plugins - An open discussion
There are way too many plugins out there and you may feel confused on which ones to buy and incorporate into your workflow. Here is an open discussion for you to ask questions and get insight for all those plugins. I'll regularly post any new releases or deals that I come across for those plugins that you should consider adding to your system.

How to record guitars with a DI
Helpful insights to using a DI to record guitars.
There are many situations where using a DI (direct input) is the best option for recording guitars. A quality DI will give you clear tone and signal with little background noise. In the modern age of digital recording, starting with clean tracks always helps when moving to the mixing stage.
The first place to start is by selecting the right DI for your studio. Most preamps offer an instrument input that can be toggled. This is a good idea because now you have the option of recording a mic or running a direct input from an instrument. You won't be able to use both inputs at the same time, but you can have them connected and just flip the switch. The GML 2032 is an excellent option for this very purpose. It has a preamp with lots of gain and a 4 band parametric EQ to sculpt the sound going in for recording. It also has a side-chain option to add outboard gear to the signal flow.
If you are looking to have something a bit more portable, consider the Little Labs Red Eye. This small box can be used as a DI and a reamp box. If you haven't explored reamping, this might be a good place to start. After you record your DI signal, you can send it back out to an amp for a reamp recording. This allows you to record the guitar part in one space and then track the amp recording at another space. You just send the output of the DI guitar recording back to the Red Eye and it will deliver the sound to the amp just as if you were plugged in.
A final note, be sure that the input signal is good when recording with a DI. If it is too low, you'll get some hiss or electrical noise when you bring up the level in post production.

Recording vocals right the first time
Vocals are the most important part of a recording. Over the years, I've heard some bad recordings that are wildly popular. It boils down to the vocals. If the lyrics and the emotion is just right, than the song will be a success. Now you should spend some time working on the music. I'm not saying that all you have to do is produce vocals, but do give the vocals the most attention.
Start by recording a very rough scratch track and than take a few moments to listen to the context of the vocals with the music. Does the feel of the track have the flare that you're seeking? Do the vocals sound like they carry the listener through the song? In some cases, it may be good to re-write some of the lyrics to convey more emotion or to mold into the music a bit more. This is a golden opportunity to figure out how the delay and reverb will be used to treat the vocals. Sometimes, the style of delay may lead you to a different style of singing or even slimming down some of the lyrics.
Now of course this technique is dependent upon the context of the song, yet I've used this approach on many tracks with great success. Next post I'll discuss more about mic placement and tracking scenarios.
How to start a recording studio | part 2
Now you've got your computer and interface all ready to go. It's time to pick out a microphone or two so you can start recording. There are so many options out there and the prices are all over the place. Keep your budget in mind and remember there is more gear needed to complete the studio. So be reasonable about what you can afford.
At the very least, seek out a decent vocal mic. Vocals are such a big part of the music that it pays to have a clean vocal mic. If you have the budget, I highly recommend the BLUE KIWI mic as your main vocal mic. It's produces a very clean sound and has impressive detail in capturing vocals. I use this mic on a daily basis at the studio and it has been my go-to mic for years. Now, this is not an entry level mic at $1,999, so don't buy it if your budget doesn't allow this expense. There are other mics out there, so do a little research and find one that works for your setup. The RODE NTK is an excellent utility mic that can track vocals and then be used to record a kick drum. The tube in the NTK gives the signal a nice analog warmth that helps tracks sit nicely into the mix. I've used my NTK on guitar amps, acoustic guitars, vocals, drums, congas, violins, and a slew of other instruments. All the tracks sound great, so this mic is well worth the investment.
Now your budget might be tight, so not to fret, there are some great options out there for a budget studio. Blue makes a few smaller versions of their flagship mics. The REACTOR is a great mic if you can find one. They're about $500 brand new and they have the same capsule as the KIWI. The Blue Bird is another excellent option and it is another versatile mic that can be used for many different applications. Right now Sweetwater.com is offering a Blue Bird mic + a Focusrite Scarlett interface for $299. That's a good deal for getting yourself up and running.
The staple mic is the Shure SM58 and you can never go wrong with this mic. It is built like a tank and can take a beating and still provide quality audio recordings. This mic is under $100 and will give you solid recordings on almost anything you put in front of it. Now it's not designed to be used as a multipurpose mic, but I've had good results from using it as a snare mic and a vocal mic. If you want a solid instrument mic, the Shure SM57 is your new best friend. It is a universal mic for anything that needs to be recorded and it is also built like a tank. This mic is the go-to mic for many engineers for tracking snares, guitar amps, toms, and sometimes vocals. Very affordable and extremely versatile are the big bonus points for these two mics.
I could go on and on about all the different mics, but these are just some of my favorites. If you have a question about a mic or want to know what I think about a particular mic, just post a comment here and I'll respond as soon as I can. Now get back to recording!
Recording Studio Tips | Turn your phone off
When you're in the studio, turn off your cell phone. There is nothing to be gained by allowing the outside world to interrupt your genius. Focus on the music and let the moment unfold with your undivided attention.
If you use your phone for lyrics or notes, that's obviously something you need handy. Just move it into airplane mode and resist the temptation to play any games. If you take photos with your phone, save the social media sharing for after the session. Unfocused time in the studio is wasted time in the studio.
What was that? Delay Delay Delay
To delay or not to delay, why is this a question? Delay is what makes the music come alive! Delay can be very tasteful and should be used to some degree on every mix. It can be subtle and very light, but it will give your mix that edge that kicks it up a notch.
Delay comes in many forms and with even more parameters. Some delays have built in filters, while others have feedback control. No matter what delay you choose to use, experiment with the controls and get a feel for how the delay responds to the audio. Once you know how the delay impacts the audio, use it to blend the sound into the mix. You can also get creative with your delay tone by adding a distortion or a flanger effect. Make the delays stand apart from the original track and they will have more impact on the mix.
If the delay has a sync feature, that can be useful if your music has a tempo map and sticks to the BPM grid. Quarter notes usually have the right amount of space and make a big impact on the empty pockets of the mix. If your mix is not on a tempo map or you're looking for a more organic sound, then turn off the sync feature and set the delay by hand. This technique is a great way to get a vintage sound for your mix. Some of the greatest mixes of the 70's have delays that were set by hand. Don't be afraid to try something new and set your own echo or delay.
Drum mics | Kick Drum Recording

The biggest drum seems like the easiest drum to mic, but this big fella can be tricky at times. You really have to pay attention to the music. The tone of the kick drum needs to match the tone of the music. This requires selecting and placing the right mic in the right spot to capture the tone that you need.
There are a few options I recommend. The Shure Beta 52 is a rock solid mic for any recording. It provides depth, punch, clarity, and snap that works well with virtually every recording. You can never go wrong when using this microphone to record your kick drum.
My backup mic is the AKG D112. This egg-shaped mic is versatile for many recording applications, so it's an excellent choice for those of you on a tight budget. Besides kick drum tracks, this mic works well for recording any instrument that has a lot of low-end detail. I've used this microphone to record congas, bass guitar, trumpets, horns, and vocals. So for the $199 price tag this mic carries, it's well worth the investment.
The third microphone that I recommend is a little unorthodox. The RODE NTK is a secret weapon that I like to use when I need a bit more slap in the kick drum. It's a tube-based condenser that has a magical sound when placed in just the right spot. Usually I find that spot slightly off-center in front of the drum head. The $499 price on this mic does put it in the slightly expensive category, but this mic can do it all. From vocals to acoustic guitar, this mic is excellent on almost any recording.
Hope this helps you get better kick drum recordings. Happy tracking.
How to prepare for a recording session
The music is finally ready to be recorded. You've put hours into rehearsal and composing the music. The band has worked out all the rough spots and the music has a good flow from beginning to end. Now comes the crowning achievement, booking time at a recording studio to immortalize the music.
There are some important steps that need to be taken before you get to the studio. As an engineer that has worked at a recording studio for 2 decades, I've seen what works and what doesn't work, so I'd like to share a bit of helpful knowledge on the topic. These steps can apply to any musician getting ready to reserve time at a recording studio. I'm also going to share some tips on how to maximize and get the most productivity out of your studio experience.
First, be sure that you're ready for recording. This is a broad generalization, so let me go over the many parts that accompany this statement. To kick it off, make sure that your music is finalized and all the parts are in place. This means that the band has been rehearsing and all the band members are on the same page when it comes to performing the songs. The last thing you want to do is spend valuable studio time rehearsing parts of a song and trying to compose the music on the fly. Now it's OK to experiment and try different ideas, but there should be a core foundation to each track so the music is recorded within the time allocated to you while in the studio.
Second, be sure that all your instruments are in good shape and sound their best. In many cases, strings should be replaced at least 3 days prior to the recording session. This will give them time to stretch and settle in for a brilliant sound that will sound great when recorded. So many times I've had guitarist come into the studio with old worn out strings and they never sound as good when compared to recordings with fresh strings.
Drummers should bring a few extra drum heads and or snares just to hear what the recorded sound turns out to be. There are many things an engineer can do for your music, but try to rely on getting good raw recordings to start with and not relying on EQ to fix any deficiencies.
Vocalist should exercise their voice leading up to the session. Don't strain or wear out your voice, but condition it just like any athlete would prepare for a big game. Don't drink any cold liquids before the session because they tend to constrict the vocal chords. Bring room-temperature bottles of water to keep the throat from getting dry and if you prefer something to soothe the throat, bring honey or tea. Studio sessions usually last all-day, so it's important to stay hydrated and bring snacks to keep your energy up. Bananas are always a good idea for natural energy and trail mix is a good way to subside hunger pains.
Third, be prepared to back up your recordings. Most studios today are recording on a digital audio workstation like Pro Tools or Logic. You need to be ready to make back up copies of your recordings so that you ensure that your investment doesn't get lost, stolen, or accidentally get deleted. Most studios will have a way for you to back up your recordings on to a USB flash drive or an external hard drive. With prices rapidly dropping on storage devices, this shouldn't be a problem to find a device with enough space to back up your recordings. I'd recommend a minimum of 2 TB, but 500 GB is usually enough for most musicians. By backing up your recordings, you will have the ability to take your recordings home and mix them yourself if your budget runs out for studio time. You could also record at one studio and then take the files over to another studio for mixing. Sometimes it's a good idea to get a few different engineers working on your music to keep the sound unique and diverse on the album.
Fourth, put someone in charge of time management. Staying on track is the most difficult thing to do in the studio. You can ask the engineer to help manage the studio time, but it's always best to have a band member keep track of the time. Most everyone has a smart phone these days and they all come with alarms and timers, so use them. Set the alarm on vibrate and let it remind you when it's time to move on. Figure out how much time you want to spend recording each song or parts of a song and stick to it. So many times I've had musicians show up to the studio with the intent of recording 3 or 4 songs and only wind up recording 1 or 2 songs. It is very easy to get wrapped up in recording and over-dubbing tracks that time will just slip away. Figure out a way to manage your time and do your best to stay on schedule.
I want to give you a few helpful ideas about how to manage your recording sessions. If you have a hard time getting all your band members together, then it's best to have everyone pick a date that is convenient for a recording session and mark it on the calendar. Most studios have a no refund or no rescheduling policy, so it's important to make sure the studio date works for all the band members.
Try to get all the recording done with all the band members present. This isn't a huge deal, but I've found that it's always nice to have all the band members at the studio when the initial tracks are recorded. Things like solos or backing vocals that will be over-dubbed can be done with individual band members. If possible, try to record the band in a live environment. I don't me a live concert, I'm referring to the whole band recording at the same time. There is a lot of "magic" that happens when musicians play together. This also helps cut down on the amount of time spent tracking each individual member of the band. Plus, if you haven't been rehearsing with headphones, don't try to do it for the first time at the studio. Try and recreate the feel you get when the band rehearses. This is the way you perform the music, so try to recreate that sound / vibe when you record.
I'll have some more helpful info for you soon, but feel free to leave comments or questions and I'll respond as soon as I can. Hope this info was helpful and your recording sessions go smoothly.
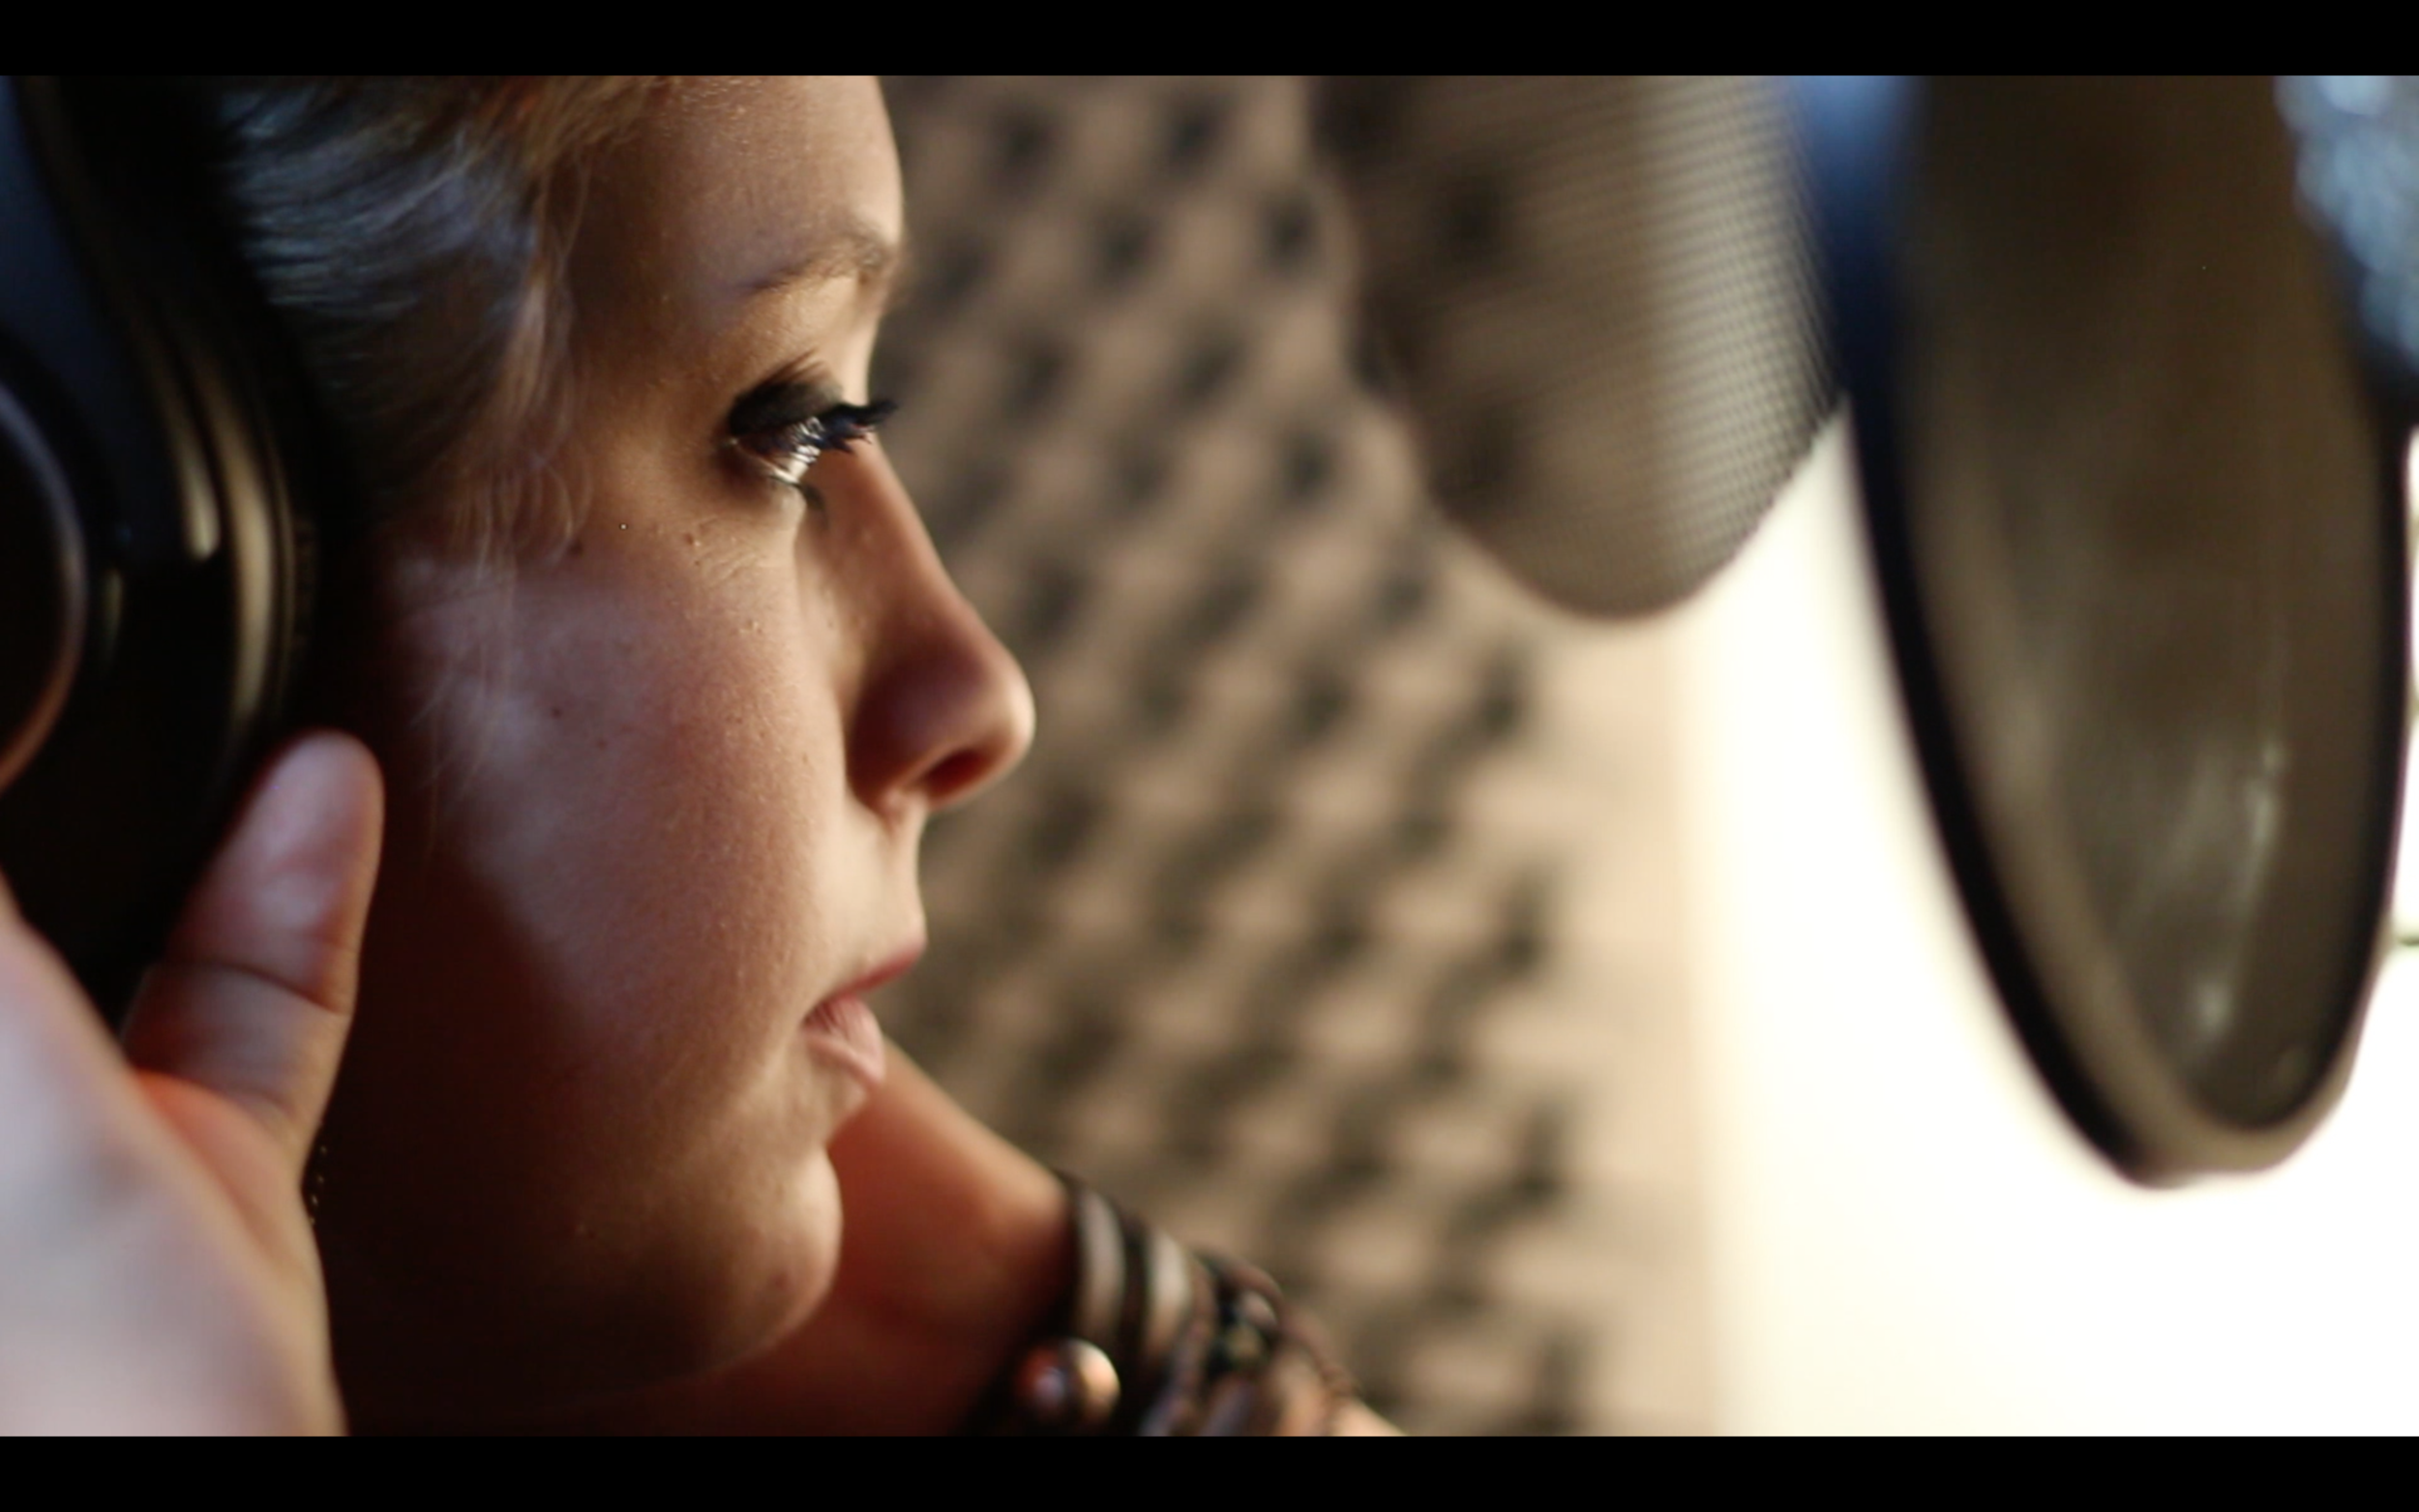
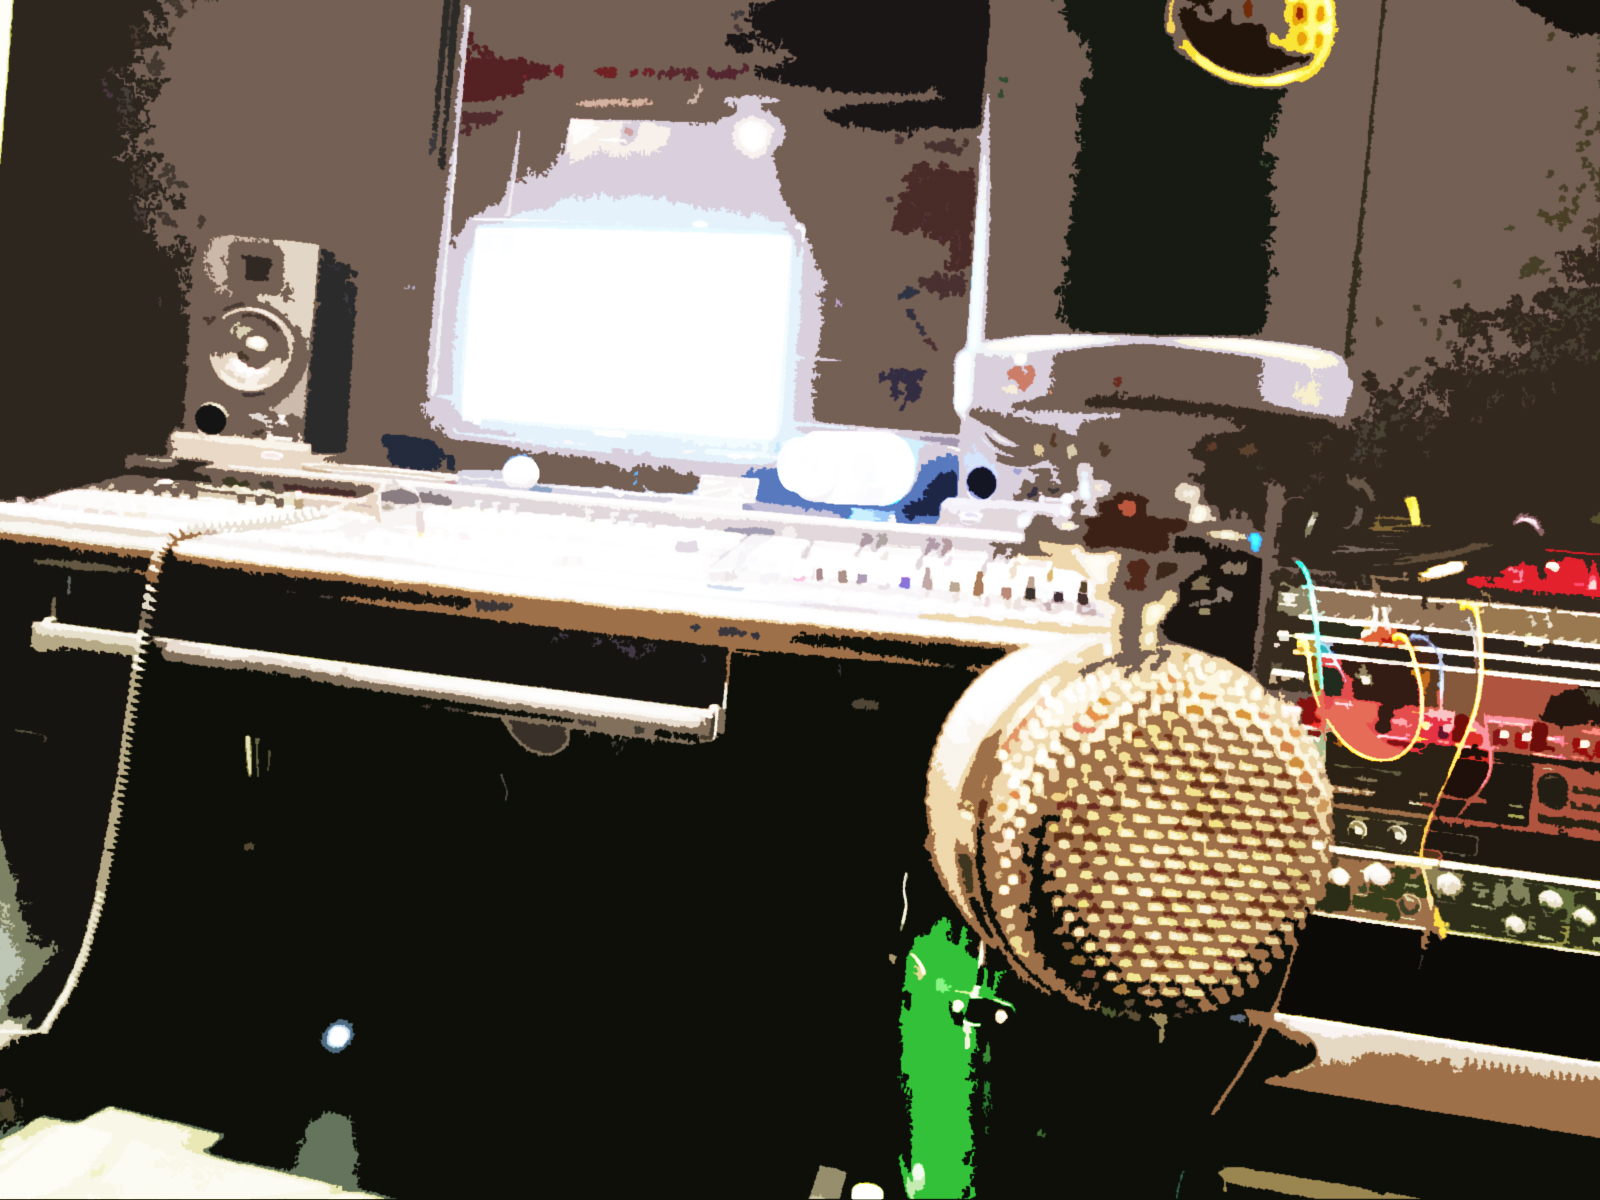
Vocal mixing tips and secrets: Mic Placement
Everyone is looking for advice about how to get those sweet full-sounding vocals into their mix. There are many options out there and I can only offer my thoughts and experience, but I encourage all engineers to think outside of the blog, book, or videos. Come up with your own way of recording vocals and you'll be much happier with the final mix. It's a great idea to take information and techniques from multiple sources and experiment to find out what works best for the music and the equipment that you have access to at the moment.
Microphones are a major factor when you're recording vocals. Not all microphones are created equal and they certainly all won't give you the same sound. The price of a microphone isn't a concern that you should worry about when searching for the right mic for your vocal tracks. Focus on a mic that will give you what you're looking to track as a solid base for your vocals. If you're looking for clean and crisp vocals, try to find a mic that has a flat frequency response or one that at least has a smooth response in the range of the vocalist. Some mics are specifically tailored for vocals and they typically do a great job. If you have the ability to audition mics before you purchase them, I'd highly recommend that route.
Now for the first tip / secret that I use to get great sounding vocals. Placement of the mic is by far the most important place to start. Move the vocalist around the mic to find the right spot for the amount of presence and clarity. Don't just have the vocalist stand right in front of the mic. Many times, vocalists will stand too close to a mic. This causes too much presence in the low frequencies and tends to pick up a lot of sibilance. A pop filter placed right in front of the mic won't alleviate this problem. But it is a good idea to use a pop filter to guide the vocalist to the proper distance from the capsule of the mic. There's not a specific amount of space that you can use on each vocalist, you have to work with how loud and what type of tone the vocalist has for each individual track. That's why they have a goose neck for being placed in different places depending on the vocalist. Plus, it's a great idea to mount the pop filter on a separate mic stand. This allows you to move the mic around while maintaining the spot where the vocalist stands. Keep in mind that the vocalist doesn't have to be on axis with the capsule of the microphone. It's quite alright to experiment with having the vocalist sing off to the side of the mic. This technique may reduce the amount presence and help the vocal fit right into the mix.
I hope this information helps you get started with tracking amazing vocals. The vocalist can be the most amazing singer in the world, but how they're recorded is half of the quality. So work with your vocalists and talk to them if you're hearing something that doesn't sound good. It's perfectly normal to have a vocalist do another take if there are problems with the recording. Never fall back on the notion that it can be fixed in the mix. Strive to be the best engineer you can be and do everything you can to get solid vocal tracks. Less is more and this goes a long way when you start to mix and the vocals already sound perfect. A few tweaks here and there and you should be able to get the right sound for the mix. Please leave a comment if you have any questions about the techniques that I've listed here.