
Music reviews
&
helpful information about recording and mixing techniques. Posts written by professional engineers and musicians.
Learn about the inside secrets that engineers at Shine On Studio use in their sessions. Become a mixmaster and impress the world with your knowledge of audio production.

Vocal Mixing | Reverb EQ Secret
There are some great secrets that have been used by engineers over the years. Dialing in your reverb with the mix has always been a challenge for many young and aspiring producers. Here are some tips from the engineers at Abbey Road studios on how to get a tighter and balanced reverb level into your mixes.
Vocals love reverb to some degree. Sometimes just a touch of reverb helps the vocals find a pocket in the mix that is just the right spot. Other times, it's cool to drown the vocals in reverb for an emotional effect. Either way, it's always a good idea to treat your Reverb bus with a little EQ.
Abbey Road studios has a great way of making their reverb tracks sit just right into the mix. It has to do with how you EQ the reverb.
If you have a nice EQ, find the pocket where the vocals have a little bit of a nasal range and scoop it out. This is usually somewhere in the low mid range between 300 Hz and 500 Hz. Sweep around in the EQ spectrum until you find the frequency that doesn't seem to just sit right with your ear. If there are multiple frequencies that don't seem to work not to both of them out or as many as you need.
This will create a more open and natural reverb sound to your mix without having to boost the signal. Give it a shot and send us your feedback.

Recording Hip Hop Vocals Tips and Techniques
Getting ready for a big studio session? Then you will want to prepare for giving your best performance on the mic. Knowing what to expect and making sure that you get the most out of your studio time is essential to making a great album. Here are some tips and things to consider before you step into the studio.
Vocals are the core of Hip Hop and recording them can be the make or break moment. All Hip Hop artists that come to record at Shine On Studio are looking for "clean" vocals that have transparent clarity and rich tone. Now, how do you capture these vocals to produce the next big hit song? There are a few steps that are crucial to the success of the track and they need to be taken care of before arriving at the studio.
First, the throat needs to be in good shape. This means no drinking cold fluids before coming to the studio. The iced coffee and 7-Eleven Slurpee are an absolute deal breaker. A cold throat is constricted and cannot provide the quality vocals that are needed on a hip hop track. Room temperature water or hot tea are a good idea to relax the throat and keep in loose for the performance. If your suffering from a cold or allergies, honey is a good way to soothe the throat and prep it for the session.
Second, warm up before the session. Just as athletes stretch and get loose before a game, vocalist need to warm up their voice before a performance. Recording is a permanent process and once the recording is complete, it is etched in stone for all time. When fans are going to listen to your recording over and over for the rest of time, it is a good idea to make sure you put your best performance on the tracks.
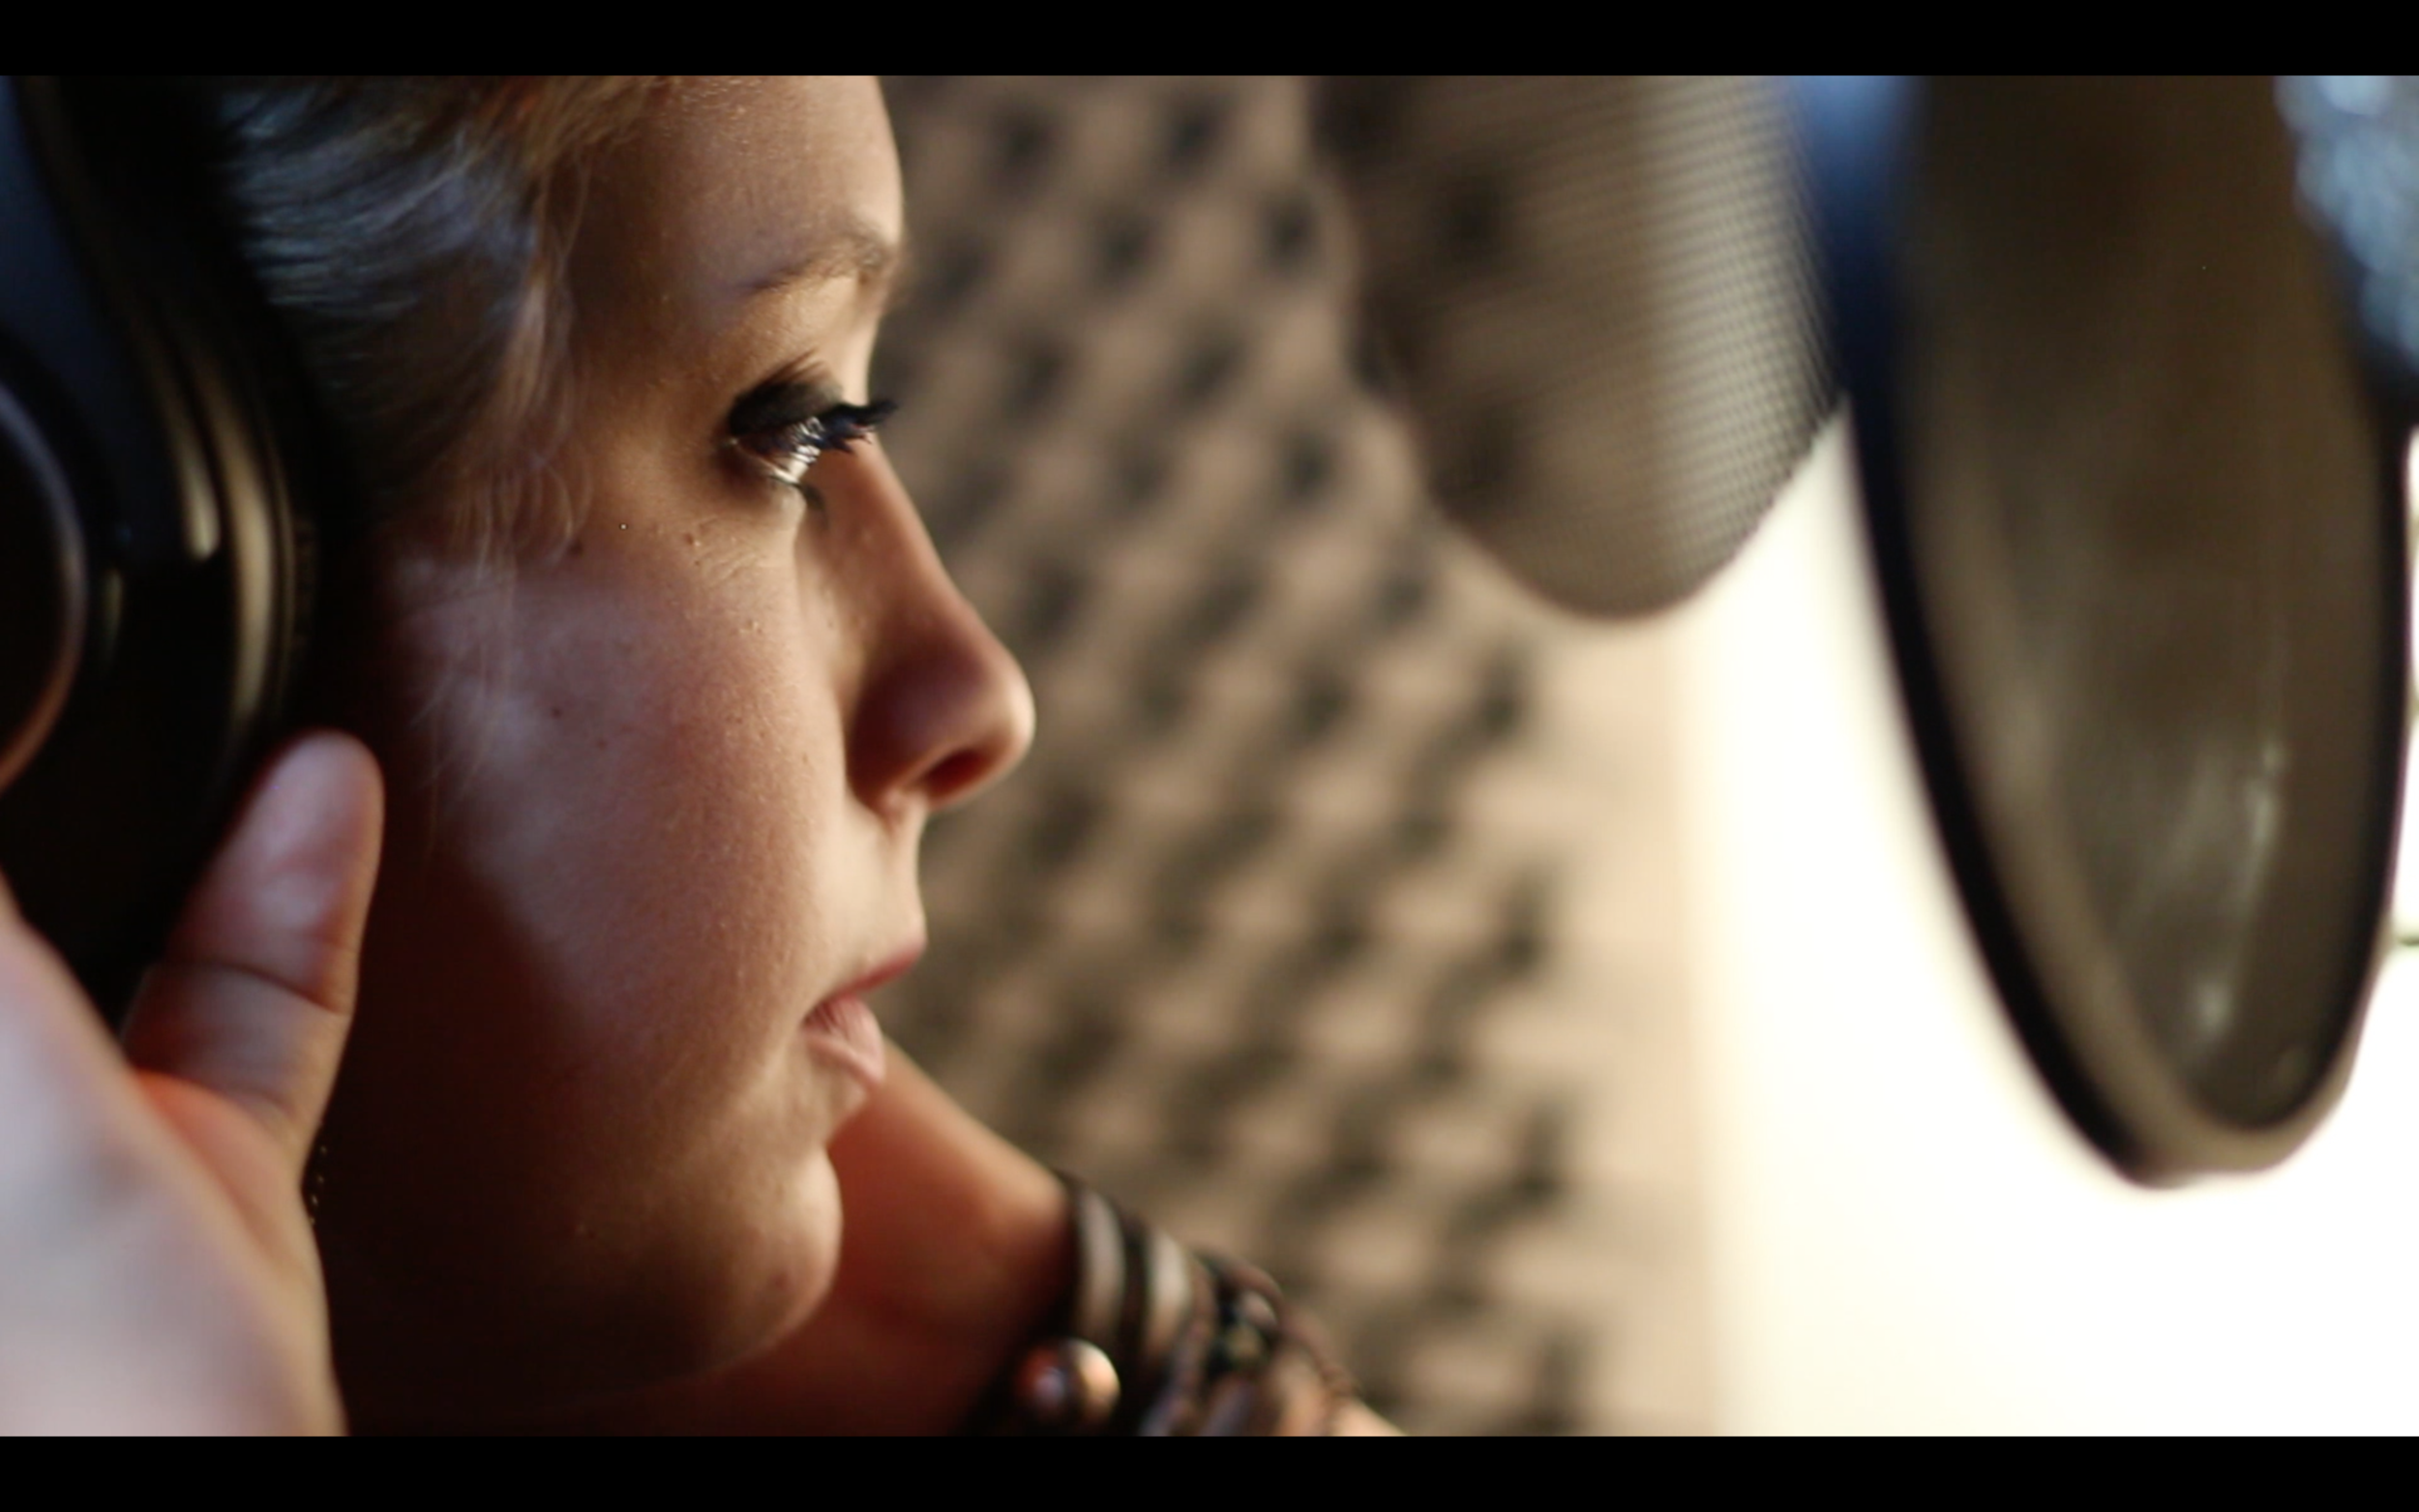
Writing your lyrics down is a good idea, but rustling papers in the vocal booth is a really bad idea. Here at Shine On, we've installed a magnetic board in the vocal booth for vocalists to hang their lyrics up on the board to keep the papers still, but also easy to see. Music stands also work, but you don't want to be looking down while singing, so a magnetic board or a cork board at eye-level is a really easy way to keep the head up and the throat straight.
Headphones are really important and the right pair can improve a vocal performance. It's good to have closed headphones that go over the ear to keep the bleed to a minimum. There are many types of headphones out on the market, but closed headphones work the best for tracking vocals. The Shure SRH840 headphones are a good choice for quality and performance at an affordable price.
These are just a few key tips and techniques that you should use when recording vocals. For more info on getting quality recordings, contact the studio staff.

Recording Drums | What Preamp to Use
Tracking drums is an art form that takes time to develop. Choosing the right preamp to pair with your studio setup is never an easy task. There are so many options out there and it can seem a bit overwhelming. This article dives deeper into some of the options available and I give you some personal advice on the preamps that I like to use for drum recordings.
Your preamp collection will constantly grow as your studio expands. Acquiring different types of preamps will give you more options on how to shape your sound and tone. Transistor preamps can give you a nice sharp sound that cuts through a mix and brings out the attack of transients. Tube preamps can give you a gritty or distorted tone that is saturated with all of those impressive characteristics of old analog recordings. Then there are preamps that blend the transistor clarity with the tube warmth to allow you to dial in the right amount of tone for your mix.

A new preamp on the market is the Warm Audio WA273-EQ. This is a clone of the coveted 1073 preamps that have defined the sound of rock music. A stereo pair of these on your overhead mics and you're all set to track slamming drums. You could add this to your existing rig and find many different ways to get the tone that you want out of it. I've used this on just the kick and snare to get big powerful tracks that sit just perfectly in the mix. The built-in EQ allows you to shape the tone as your recording and really cuts down on the post-production work. I've done EP and demo albums for bands in less than 4 hours because this preamp takes all the guesswork out of post-production. This preamp is one of my Swiss Army tools that can be used on tracking virtually anything, but drums are articulatly sculpted with these discrete premaps.
Tracking drums is an art form that can take years to develop as you experiment with different combinations of gear. Mic selection is a major factor, but for this article, I'm just going to focus on the preamp selection. The first thing you have to consider is the context of the song. Your preamp choice will mostly revolve around the mood and performance of the song you'll be recording. Jazz and Blues tracks are usually mellow and have a little fuzz on the drums. In these recordings, I lean towards my tube preamps to give me that coloration to blend the drums into the mix. Rock & Pop songs like strong transients, so lean more towards my transistor preamps. Preamps can be mixed and matched. Try tube preamps on your Kick & Snare with transistor preamps on your Overhead mics. This will give you a nice blend of the tones.

The Universal Audio Twin Finity preamp is a workhorse in the studio. The tone blend between tube and transistor make this a must have preamp for every studio. Use this preamp on your kick drum and just by moving the tone blend pot, you can hear the transients saturate or sharpen. I'd suggest you add this preamp to your wish list this year. If you want a little more bang for your buck, check out the UA 4-710d. This is a 2u rack mount version with 4 Twin Finity preamps that also have an 1176 style compressor built into each channel. A very versatile preamp box that gives you 4 options to shape and sculpt your drums.

The Manley Force is another excellent choice for a versatile tool in the studio. The headroom on these preamps is immense. Making it possible to use ribbon mics for your overheads or room mics. Built in HP filters and impedance selectors allow you to get the warmth you want matched with the mic your using. The Manley Force is more than a drum preamp, it offers many useful features for tracking all instruments, so this should be on your radar as you upgrade your studio.
Hope these tips and recommendations give you a better idea on how to strengthen your studio. Happy recording!
Podcasting 101 - How to start up a Podcast
Podcasting is a great way to sharpen your audio production skills. You have opinions and podcasting is the perfect way to convey your thoughts in an engaging media. Here are some ideas and options for gear to get your podcasting career heading in the right direction. Click on the post title to view the entire article.
You have an idea or a topic that you want to discuss and now you've decided to turn it into a podcast. Good idea! Now where do you start? Let me get you started on the right path to becoming a successful podcaster.
Start with a script or an outline of the topics and points that you'd like to cover. It doesn't have to be verbatim text that you plan to record, but there should be some main topics with some additional notes or ideas that will help you keep the conversation flowing. It may be good to emphasize a few points as a review, but try not to repeat yourself. There's nothing more boring than listening to someone talk about the same thing over and over without implementing new ideas as they go along. Keep it moving and keep the listeners interested in the topic.
OK, now you have your ideas written down and you're ready to record. But wait, you don't have a microphone. Not to worry, you probably have a smartphone, right? If so, you have a handy little recorded right in your pocket. Now the audio quality might not be stellar, but it is a place to start. You want to try and get the best recording quality that you can and most modern smartphones do a decent job of recording voices. I'd suggest that you find a quiet spot to cut down on the ambient noise and maybe use the headphone cord with the built in mic to keep your sound consistent. Plus, the earbuds will serve as your monitors.
So maybe you're not thrilled with the idea of recording on your phone. Not to worry, there are some options that will get you going and not break the bank.

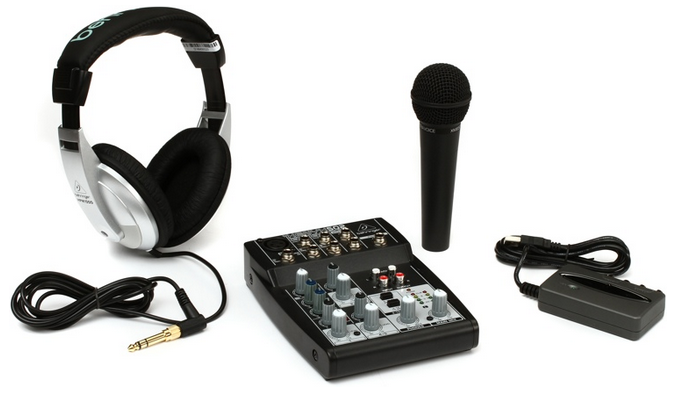
Behringer Podcast Studio Package
If you're on a tight budget, but still want to get a decent setup for your podcasting, you're in luck. Behringer has a podcasting package ($99.99) that includes a mic, mic cable, mini mixer, headphones, tripod, and some accessories to get you everything you need to be the podcast star you're destined to become. This Podcast Studio will give you the ability to record your voice and also patch in some audio devices if you want to have music or sound effects added to your episodes. With this efficient setup, you'll be able to get a clean recording that will be professional and easy to control. There are not many packages out there that can compete with this one. The versatility of this setup will allow you to be creative, but also be mobile for those sessions where you want to hit the road.

Now if you're looking to be a little less complex with your setup and want to have something that is a little more plug-and-play, the BLUE YETI is a great option. This is a USB mic that allows you to just plug right into your computer and start recording. There is a headphone jack on the bottom of the mic that will allow you to monitor your recordings and also enjoy that sweet sultry voice of yours. This mic has a built in stand, so you're ready to go right out of the box. With all the controls right on the front of this mic, it's almost fool-proof. Now there is one bonus to this mic, it comes with the Presonus Studio One Artist software. This is excellent audio editing software that will take your production to a whole new level. Plus, you can use this software to compose your own music. You really strike gold with this mic if you're willing to put a little cash upfront. Now you'll need to purchase headphone or use your earbuds, but at $149.99, this package is well worth the investment.

The RODE PODCASTER is a really nice all-in-one USB package that gives you excellent quality for a reasonable price. ($229) This bad boy has a built in headphone amp that allows you to monitor your recording directly through the mic. The USB cable connects to your computer and viola! You are now ready to rock and roll with your podcast. You will need a mic stand for this smooth criminal, but not to fear, there are many great options.
In the world of podcast microphones, this one stands alone. The audio quality is quite nice and if you want that radio announcer sound for your voice, this is the mic for you.
Now that you're all buffed on where to start and how to get the audio recording going, it's time to start making your podcast. Be sure to use decent audio editing software and clean up your recordings. Trim off any coughs or dead air and keep the audio flowing. This will ensure that your audience keeps their focus on the content. It would also help to use some music that you have created in the segues and at the introduction of the podcast. Music can give you a more polished and professional sound, so try your hand at making some music.
Just as a footnote, be sure to give credit where it is due. If you research information, be sure to reference where you found the information and anyone that was involved with your podcast production. Karma is real and it will come around if you pay it forward.

The right amount of reverb for your vocals
Getting the right amount of Reverb on your tracks is never as easy as the professionals make it look. It does take a little bit of time to sit and listen to your levels. Here are some ideas for how you can dial in that reverb level and make it feel like part of the mix.

Reverb is that wondrous sound that can lift vocals to a new level and make a song come alive. With the right amount of mixing, reverb can be the tool that takes a song into the hearts of many fans.
The right amount is subjective, but it's a good idea to get a reference point by listening to some of your favorite songs. Try and hear how much reverb they used when producing the songs. Differentiate between reverb and other effects like delays and flangers. Envision how big the space is around the vocals. Measure how long it takes for the reverb to diffuse and fade away. Once you have a decent reference point, now you're ready to start adding reverb to your mix.
Keep the reference song(s) within easy reach as you start your mix. If your DAW allows multiple auxiliary tracks, create 3 or 4 tracks for multiple reverbs. Assign the vocal track sends to each of the different reverb aux tracks. On each of the aux tracks put a different instance of reverb. If you have multiple reverb plugins, put a different one on each aux track. If you only have one reverb plugin, put it on each aux track. Now go thru each reverb and set their parameters. Make the first one a plate reverb. The second can be a hall reverb with big reflections. The third can be a room reverb with a fast diffusion time. The fourth can be an ambient or chamber reverb that has some strange or unnatural settings. This will be our texture or icing on the cake aux track that give the vocal some depth and width.
Now you can start with one reverb and tweak it to hear how it mixes with the vocal and music. Go down the line and create a mix with each of the different reverbs. A/B each of the reverbs to hear how each one is creating a different space for the vocals. Tweak as needed and even try blending two, three, or four of the reverbs to create the right amount of space you're seeking. Many of my own mixes have two, three, four, and even five different reverb tracks running at the same time to add texture, depth, and resonance to the vocals. If one reverb works, that's all you need. When you want more, try blending a few different reverbs and set them up to enhance separate parts o the vocal track. Use automation to create volume swells or emphasis on different phrases.
Music needs to have motion to keep listeners engaged. Automating reverb and other auxiliary effects is a great way to keep a mix in motion. Try just a little bit at first and as you get more comfortable, go hog wild with your automation. It's always a good idea to "Save As" your session mixes so you can return to your original session if you want to revert for any reason. Heck, make 2 or 3 different mixes from scratch and then compare them side by side. If they sound similar, you may have a very distinct ear. If they're different, then you have multiple options to show your clients or fans and get their feedback.
Go have some fun with reverbs and mold your vocal tracks into the most amazing part of your mix.

Mixing with Headphones - Which Ones to Use?
Mixing with headphones can be productive if you follow a few helpful steps along the way. Let's discuss the advantages and disadvantages of mixing with headphones.
This is a question that seems to come up quite often, so here are my thoughts and some recommendations for mixing with headphones. First thing is that it is OK to mix with headphones. Lots of great albums have been mixed on headphones and you can get a professional sound. For many DIY musicians and home studio engineers, the mixing room is not always optimal for sound. A decent pair of headphones will give you a more accurate presentation of your mix.
Now here is a main factor to consider, the quality of your headphones really does matter. Not all headphones are created equal. Some headphones are designed specifically for the studio and others are designed for listening and playback. So how do you know what is the difference between headphones? Most studio headphones actually put on the packaging that they are studio headphones. But words don't necessarily mean that you will get the quality needed to mix properly. It is always advisable to listen to a pair of headphones before you commit to buying them. I don't recommend buying headphones because of the name brand or because someone famous endorses them. Companies are in the business of selling their product, so you can't just take their word or reputation for granted.
I've owned lots of different headphones over the years and some are good for recording, some good for mixing, and some good for listening and enjoyment. Every pair of headphones I've owned have had their own strengths and weaknesses. It just takes time for you to get used to the sound your headphones provide so that you can be productive in your mixing choices. If mixing with headphones is the route that you plan to take for your post-production, I'd suggest getting a decent pair of headphones. Many of the headphones in the $99 - $199 price range will give you a decent representation of your mix. Let me give you my experience with a few different models that are out on the market.

Sennheiser HD 280 Headphones
When I was starting out, I used Sennheiser HD280headphones for recording and mixing. These are great headphones for all applications and music. They have rich detail in the low-mids and don't get too harsh in the upper frequency range. That's a bit of good news for your eardrums. These headphones are comfortable and do collapse down for easy transport from one place to another. I'd say the big plus for these headphones is the price. At under $100, these are some of the most affordable professional headphones you can buy. Especially if you're on a budget and would rather spend your money on gear or mics. The ear pads can be replaced when they get old and worn out, so you can keep the feel of these headphones in a feels-brand-new fashion at any point.
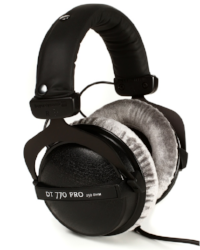
Beyerdynamic DT 770 Pro
I moved on to a pair of Beyerdynamic DT 770 Pro studio headphones. I was initially impressed with the comfort, quality, and sound of these headphones. I demoed a pair at a local pro audio shop and a few minutes later walked out with a brand new pair for the studio. Now these are a bit more price-wise, but you get quite a bit for your money. The large ear pads are extremely comfortable and they don't squish your ears against your head. This was a huge plus right off the bat for me. For $199, I felt like I purchased a quality pair of headphones that would give me many great hours of recording and mixing. I used these headphones for about 2 years and mixed some of my favorite albums with them. Yet as the years went by, I started to be a little more critical of my mixing and felt that these headphones were not giving me enough detail on the high-end. This was frustrating, so I went back to search for a new pair of headphones. However, I do still use these headphones for recording and mixing from time to time. I still like the comfort and the relaxed feel they provide. Most of my clients prefer this pair of headphones when they're tracking and I agree that these are headphones that you can wear for a long period of time and not get too fatigued.
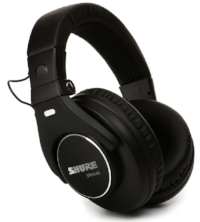
After some research and field testing of some different headphones, I decided to go with the Shure SRH840 professional studio headphones. There are a few reasons I chose this pair of headphones and I still feel like these are the right pair for most studio applications. The ability to easily replace the ear cushions and the cable are big advantages, so I'm already a little happier. This is just the tip of the iceberg. The sound quality of these headphones is transparent and dynamic. The drums that I've mixed with these headphones are crisp and punchy without being too muddy or boomy. I've also been able to get a better vocal balance in my mixes with these headphones. Having a good vocal balance can really make or break a song. You have to have faith in your headphones to give you a clear representation of your mix. To be able to trust your ears and rely on your headphones is crucial. These headphones are comfortable for short periods of time, but a long studio session can be rude to your ears and neck. These headphones are a little heavier than some other pairs I own and I notice that my neck can get cranky if I rock the headphones for too long. Overall, these are the best pair of headphones that I could find under $200.
Now one thing to keep in mind is that I don't solely use headphones to work on my mixes. I also use the studio monitors, but I regularly check my mixes with headphones. I recommend taking regular breaks if you are using headphones. Give your ears some time to recover and unwind from the constant noise that is only inches from the eardrum. These are just a few of the headphones that I own and/or have used in my career as a musician and producer. There are so many options out there and manufacturers keep improving on the designs, but I stand by my original statement that you need to go out and actually put the headphones on and listen to them for yourself.
Sometimes it is good to use earbuds to check your mix. You may be asking yourself, "Why would I use earbuds to check my mix?" Well, good question. The main reason is that your mix will most likely be heard on earbuds by the majority of listeners. Mobile music is the new trend and everyone has earbuds with their phones and MP3 players. So get in the game and make sure you are covering all your bases.
I did just purchase a pair of the Focal Spirit Professional headphones as a personal pair for my own listening enjoyment. I haven't had enough time to evaluate them, but my first impression is that they are on par with the BOSE noise-cancelling headphones. The ear cushions are quite snug and I don't know if I would use them for mixing. When I have more experience with them, I'll post my thoughts.

How to get good vocal tone for your podcast
When you're working on your Podcast and you're just not getting the sound that you want to hear, you may need to change your setup a little bit. The right combination of microphones and equipment will help you yield the results that you're seeking. Pro audio gear comes in all different styles and purposes. This article will give you some insight into where you can start.
Searching for the right vocal tone can be difficult, but it doesn't have to be. Getting the right signal chain setup is the most important part of the process. Now you could just use any microphone you have on hand, but you do need to consider the quality of the mic in relation to what you will be recording. Most podcasts are done in a narrative style and that does require a certain amount of clarity. Listeners need to be able to understand what your saying without the interference of background noise. To achieve this tone quality, you need to use the right mic and preamp.
Condenser mics seem like a reasonable choice because they work so great with vocals on songs. However, they tend to pick up room noise during tracking, so your room need to be quiet and properly treated for reflections. You could put your head under a blanket, but who wants to do that for every podcast? So maybe a condenser mic isn't the best choice.
Dynamic mics are great for getting that boomy radio voice. You can get right up on them and induce the proximity effect for the desired depth and presence that you want. Still, there are drawbacks to using a dynamic mic. The input signal is always too low, so you wind up cranking the preamp. This induces noise from the amp and that can sound harsh and unpleasant. So you get closer to the mic to increase the signal, but now you have a lot of plosives to deal with. This forces you to use a pop filter and now you're back to a weak signal.

Here's the solution. Get yourself a Cloudlifter. If you've never heard of the CL-1, then you should acquaint yourself with this little device. This little blue box will elevate your dynamic and ribbon mics with +25dB of input gain without the amp or background noise. You just put it in the signal chain and send it 48v phantom power. The beauty is that the box doesn't send the phantom power to the mic. This way it's safe to use with ribbon mics and gives them the needed boost to provide you with a solid input level for your recordings.
I found you some options for buying a Cloudlifter box. You can go with the CL-1 for $149. This is great if you just have one mic and want to buy just what you need. However, if you plan on doing interviews or having a guest speaker sit in the studio with you, it's a great idea to get a CL-2. This is a 2-channel Cloudlifter box that will give you the same quality. The best part is that the channels are separate, so you can use one or both at a time. The link I found will also get you a couple of mic cables included in the price.
Now the mic you're using is still a variable, so leave a comment with the mic you're using and we can discuss more details about getting the right tone for your voice and podcast.
Producing Music - Where to start
Producing is the construction of music. You have to make choices about the project as a whole and this will include things like EQ, panning, compression, lengths of the delay, when to delay, when to chop up the vocals, when to add guitar solos, how the song begins and ends, and everything else that happens in between. This is not an easy task, but it does have huge rewards that are long-lasting if you do it right.
Producing music is something that takes time to craft and comes with lots of experience. If you're one of the gifted few that can just produce w/o experience, you may still get some insight from this post.
Producing is the construction of music. You have to make choices about the project as a whole and this will include things like EQ, panning, compression, lengths of the delay, when to delay, when to chop up the vocals, when to add guitar solos, how the song begins and ends, and everything else that happens in between. This is not an easy task, but it does have huge rewards that are long-lasting if you do it right.
To achieve this goal, you need to do a bit of homework. Start by listening to some of your favorite music. Pay close attention to all the little details. Take notes on when each instrument comes into the mix and where it is panned in the stereo spectrum. Then pull apart the mix in small bits as you explore every aspect of the sound. A well-produced mix has many layers and when you examine each layer, you will understand how the producer constructed their masterpiece.
To keep you on the right track, start reading some books about producing that have been written by the masters. "Behind the Glass" is a great perspective of what it's like for producers working in the world's biggest studios with some of the most famous musicians. Gain some insight on what will be ahead of you before you cross that bridge.
Once you think that you have a good grasp on how to produce, go and find a small band that is just starting out and see if you can produce them. If you can produce a band that has very little experience in the studio, then you're ready to start your career as a producer. It is no easy task to work with musicians that have never worked with a producer. If you succeed, that is one of the most difficult hurdles to overcome. You've got a lot ahead of you and the rest will fall into place as you move along. You may not succeed right away. In fact, it will take time to get settled into the role. Keep plugging away at the challenges that arise and you will find ways to overcome them.
If you want to start even smaller, just try to produce one song on your own. Do some MIDI composing and get some samples together. See how long it takes for you to come up with the melody and rhythm. This will give yo some insight as to how long it will take when you work with other musicians on their production.

Plugins - An open discussion
There are way too many plugins out there and you may feel confused on which ones to buy and incorporate into your workflow. Here is an open discussion for you to ask questions and get insight for all those plugins. I'll regularly post any new releases or deals that I come across for those plugins that you should consider adding to your system.
Using Playlists in Pro Tools
Learn more about how to get the perfect take for your vocal recordings using the playlist feature. Get your sessions more organized and utilize your engineering powers to be more efficient in the studio. Click on the post title for the full article.
Playlists feature in Pro Tools
There are times when you need to be a powerful audio engineer and knowing your tools is ever so crucial.
Pro Tools is by far the most powerful DAW on the market. No other DAW is even close to offering the same ability to streamlining a workflow for professional use in the studio. I've tried to use Logic and Studio One, but they just don't offer the speed and professional touch that I need when it comes down to tracking and mixing clients that need to be meticulous with their production.
I've spent years behind the console and doing endless takes on vocal tracks. Now that I've had the experience of working with multiple DAWs, I'd always turn to Pro Tools for the ease and professionalism that is available. It's not even a competition in my opinion. Being able to pull up multiple playlists with ease and then auditioning them with the track is just so convenient in Pro Tools.
Now utilizing the playlist feature is the first step. I've had many sessions come to my studio in the past few months and almost none of them took advantage of the playlist feature. This is just a shame and makes me ever so sad. Punching in is a part of studio life and it is a good way to make sure you get a solid performance out of the musicians. Yet, there is a slim chance you will get an excellent mix out of a session if there is only one vocal performance to mix. The best tactic is to let the vocalist do multiple takes of the track and let them focus on a linear performance. Keeping them in the moment and capturing the emotion of the track is your job. If you are starting and stopping the performance, it will come out disconnected and lack the flow to keep the music moving.
So here is where you start, let the vocalist do an entire take of the song from beginning to end. This can be a scratch track, but orient yourself to the flow and the emotion that the vocalist puts into the track. The most important thing is to just sit back and listen. Don't stop the recording for any reason. Well, unless the vocalist stops singing or asks to stop, but then start them back up again. Once you have this first main track, you can now discuss the road map for how you want to record the rest of the takes. Some vocalist will want to break down the recordings by verse or even by line. I'd suggest that you at least get them to do whole takes of the verses and chorus.
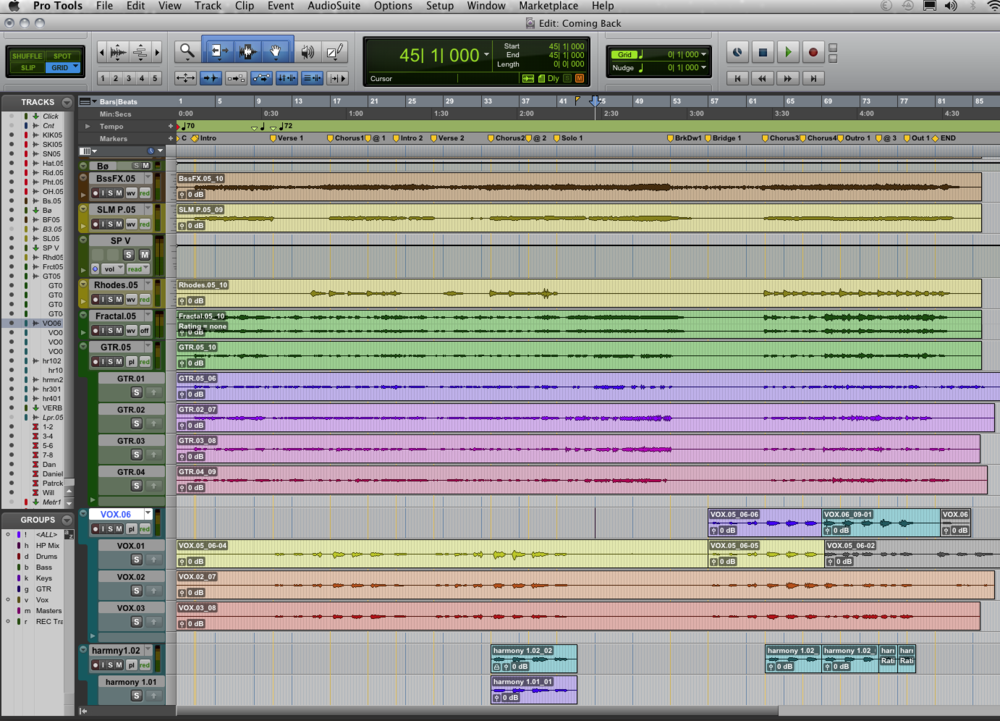
With every pass of the recording, be sure to create a new playlist. You can do this by clicking the drop down menu just to the right of the track name. Choose the "new" option to create a new playlist for recording. There will be a pop up window that asks you to name the track. Just let it auto-name the track and it will add .01 to the end of the track name. This will increase to .02 for the next take and so on. This will be an easy way to keep track of the takes and allow you to streamline your mixing after the recording is finished.
To make sure you have enough material to work with during mixing, I usually suggest at least 3 takes of vocal recordings. However, you can do as many as you feel is necessary or that the vocalist wants to track. Next post we'll get into more of the editing side of the playlist feature.
Custom Studio Setup
Take time to make your studio space comfortable and inspiring. Surround yourself with a visual space that gets you motivated.
The studio is a sacred place for you and your music. Making it unique is vitally important to the success and prosperity of your creativity. When you add your own touch to the studio, it becomes a sacred place for you to create and explore music. Surround yourself with art and visuals that inspire you and your clients to develop new ideas and solidify the passion that is being created.
Find a way to make the space yours. That is the most important part of the creative process.

Get a new look for your sound with the iRig Acoustic Guitar mic pickup.

Cable rack abstract art

How to record guitars with a DI
Helpful insights to using a DI to record guitars.
There are many situations where using a DI (direct input) is the best option for recording guitars. A quality DI will give you clear tone and signal with little background noise. In the modern age of digital recording, starting with clean tracks always helps when moving to the mixing stage.
The first place to start is by selecting the right DI for your studio. Most preamps offer an instrument input that can be toggled. This is a good idea because now you have the option of recording a mic or running a direct input from an instrument. You won't be able to use both inputs at the same time, but you can have them connected and just flip the switch. The GML 2032 is an excellent option for this very purpose. It has a preamp with lots of gain and a 4 band parametric EQ to sculpt the sound going in for recording. It also has a side-chain option to add outboard gear to the signal flow.
If you are looking to have something a bit more portable, consider the Little Labs Red Eye. This small box can be used as a DI and a reamp box. If you haven't explored reamping, this might be a good place to start. After you record your DI signal, you can send it back out to an amp for a reamp recording. This allows you to record the guitar part in one space and then track the amp recording at another space. You just send the output of the DI guitar recording back to the Red Eye and it will deliver the sound to the amp just as if you were plugged in.
A final note, be sure that the input signal is good when recording with a DI. If it is too low, you'll get some hiss or electrical noise when you bring up the level in post production.

Recording vocals right the first time
Vocals are the most important part of a recording. Over the years, I've heard some bad recordings that are wildly popular. It boils down to the vocals. If the lyrics and the emotion is just right, than the song will be a success. Now you should spend some time working on the music. I'm not saying that all you have to do is produce vocals, but do give the vocals the most attention.
Start by recording a very rough scratch track and than take a few moments to listen to the context of the vocals with the music. Does the feel of the track have the flare that you're seeking? Do the vocals sound like they carry the listener through the song? In some cases, it may be good to re-write some of the lyrics to convey more emotion or to mold into the music a bit more. This is a golden opportunity to figure out how the delay and reverb will be used to treat the vocals. Sometimes, the style of delay may lead you to a different style of singing or even slimming down some of the lyrics.
Now of course this technique is dependent upon the context of the song, yet I've used this approach on many tracks with great success. Next post I'll discuss more about mic placement and tracking scenarios.
The effort it takes to run a recording studio
The dream has been achieved! I am living the life I've always wanted and it feels great to work in my own studio everyday. The rewards are tremendous and there is nothing I'd rather be doing with my time. Being so immersed in my work on a constant basis has given me the knowledge and experience that is required to work at a professional level in this industry. I know many of you are looking to attain the same goal, so let me share just a fraction of my awareness with you.
First, running your own business, regardless of what you do, is no easy task. There are quite a few things you need to consider before diving into starting up a recording studio. Consider this, you'll need to cover your overhead and start up costs before you see a dime of profit. The initial investment is what overwhelms most entrepreneurs and that is just the tip of the iceberg. You're going to need a computer that is powerful enough to handle the processing, a DAW software program, an interface, lots of cables, mics, mic stands, headphones, headphone mixers, racks for gear or road cases, power conditioners, external hard drives, and potentially a studio space. This is just the foundation, there are plenty of other bells and whistles that you'll need to pull off a professional studio.
Now that that idea is rattling around in your head, tackle this notion, you will need to budget for electricity, water and sewage, garbage service, insurance, a security system, and rent. So your budget on a monthly basis is around $2,000 just to keep the doors open. That's the cheap end of the spectrum, which will probably not be adequate enough to compete in the market.
Now if you've invested a large chunk of change into an education in audio production, owning your own studio is the ultimate goal. These startup and recurring monthly costs are just scratching the surface of what you need to consider for operating a steady and reliable studio business. I just wanted to get your mind in motion for all that needs to be considered. Check back in soon as my next few posts will dive deeper into the elbow grease that is needed to keep a studio running smoothly and having the stamina to build a solid reputation to keep the machine well oiled.
How to mix reverb on vocals
This is probably the #1 question that I get asked by many of the students. This is one question that has many different answers, but one underlying theme. You have to listen to the music and find the right balance for the reverb within the mix. There are a lot of factors that go into the decision of choosing the texture and depth of the reverb so that it is audible and felt, but not distracting. If the reverb is meant to be huge, use your judgement to make sure the space is the right fit for the mood of the music. Let me go over a few examples of what reverbs should do to add to the mix and not destroy them.
The first thing you need to ask yourself is does the track need reverb. Not all songs need to have reverb! This is something that gets overlooked by amateur engineers and producers. Just because it is there does not mean you need to use it. The simple test, if the mix sounds really good without reverb, then it does not need any reverb.
If you decide that the track could use some texture, depth, width, or space, then try a few different reverbs as a starting point. I usually set up about 4 - 5 different reverbs to give options, but it is not uncommon for me to use a blend of all the different reverbs. Sometimes all you need is one reverb to achieve the sound that is needed for the mix. When one is not enough, then it is time to start experimenting with the audible pleasures of multiple reverbs. Start with two and bring the levels down so the effect of the reverb is not audible. As the mix plays back, slowly bring in the first reverb until it is just barely noticeable. Then bring in the second reverb until they two compliment each other. You may need to adjust the size or predelay to get that silky smooth sound, but make small adjustments as you go along. Just go with your gut and let your ears tell you when the level of reverb is right.
The main thing to keep in mind is that the reverb is not the main focus of the song, so it should be in the background and enhance the song. Keep a modest amount of reverb in your mixes and your songs will start to get more attention. Music is organic and has life of its own. Be sure to let the music breathe and compliment it with the space of your reverbs. When in doubt, less reverb is what will work.
http://shineonstudios.com This video is a follow up video for mixing vocals. Here you'll learn how to add different effects to your vocal tracks to help them blend a little better into the mix. Engineer David Hughes takes a female vocal track and adds a reverb, 2 different delays, and a tube saturation track to blend the vocal a little more into the track.
Music Review | Never Look Back / Words
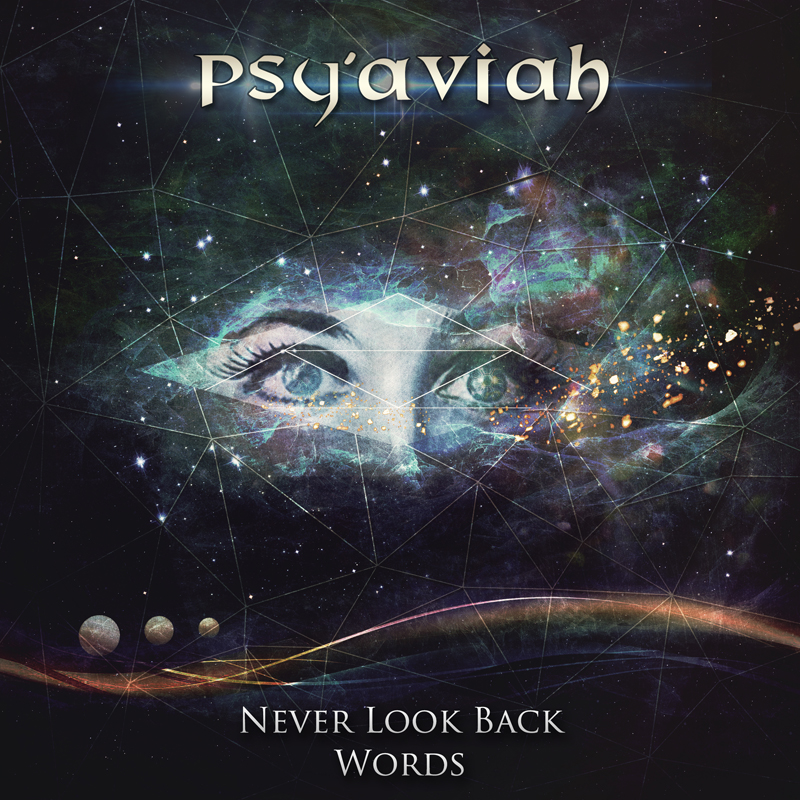
Music can be a great way to convey emotion. PSy' Aviah has found a way to capture the idea and portray it through music. The album cover is a perfect representation of where the music is going to take you. Deep electronic rhythms resonate throughout this enigmatic music and transport the mind to another dimension of emotion.
Never Look Back / Words EP
Music can be a great way to convey emotion. PSy' Aviah has found a way to capture the idea and portray it through music. The album cover is a perfect representation of where the music is going to take you. Deep electronic rhythms resonate throughout this enigmatic music and transport the mind to another dimension of emotion.
The track "Never Look Back" takes you on a voyage through the cosmos of the subconscious. Ellia Bisker guides you through the uncharted and unknown future. Moving forward is all we can do in this life and this track has the motion that keeps music traveling into the future of humanity.
The strong female vocals of J Airi on the track, "Words," resonate deep into the message of the song. Her passion is expressed in the powerful annunciation of the lyrics. The concept has been achieved and this album has the potential to be a timeless classic.
Fans of Moby, Dido, Ian Pooley, BT, & Lindsey Sterling will find a musical connection to the music of PSy' Aviah. The symphonic melodies configure a complex array of imagination.
Members: Yves Schelpe (Music & Lyrics)
*lyrics on "Never Look Back" by Ellia Bisker
Band: PSy'Aviah (aka Open-Minded Electronic Music With Heart & Soul)

Music Review | STV
A midst the sea of indie musicians, there are a few that come along and captivate the world. STV is a musician that strikes a deep chord with melody and emotion.

VCR released July 24, 2015
A midst the sea of indie musicians, there are a few that come along and captivate the world. STV is a musician that strikes a deep chord with melody and emotion. Front man, Steve Counts, has the purity of a musician that connects on a spiritual level with his own songs. A connection that is starting to become more and more rare as pop music evolves.
The music on his recent album, "VCR," is a collection of tunes that are crafted with lyrics from the subconscious and bring imagination back into everyday life. It is hard to believe that these tracks almost didn't see the light of day.
Songs like "Suburban Function" resonate with the day-to-day life that so many of us experience in this modern world of constant responsibility. Another track, "Love is a Wild Bird," has the elegance of a contemporary ballad for fans of acoustic music. The magic is in the lyrics and the refined delivery of the vocal tracks.
Fans of BECK, Ween, U2, Macy Playground, The Flamming Lips, & Nick Drake will love the music of SVT.
More info & music samples at Hembot Records: www.hembot.com/stv/
Music Review | Dirty Tricks | I Feel Remix

New Music Monday is here and I'm moving all my reviews over to this blog address. I've got a good one for you today. Dirty Tricks has released a new remix featuring Sophia Stutchbury for the track, "I Feel." Go to my soundcloud.com page and listen to their music in my NEW MUSIC playlist.
The fusion of EDM, House, Hip Hop, Rap, and Symphonic Trance are all present in this new creation from the musicians that are creating waves in the industry. You will come across the enticing sounds of Dirty Tricks before long and you can get them in your digital sound library now.
Sophia's voice is angelic. The music has a rhythm that will get your hips in motion and bring you to a higher mental state. Music is the elixir that fuels the soul and this track has all the right ingredients to get you motivated to keep soaring.
Music Review | Red Martian "Ghost into the Fog"

Beatles & vintage rock enthusiasts get excited for the new album from Red Martian. The 13th commercial release from the band has finally arrived and is a masterpiece of modern recording while retaining the classic sound of the past decades of music. The new album, Ghost into the Fog, is a collection of songs that draws the ear in closer to the music as the album progresses. With the mesmerizing vocals that are reminiscent of the iconic band Oasis from the 90's, this album has a sound that will appeal to fans from all music genres.
The saturation of the guitars ranges from the grunge era of the early 90's to the modern contemporary rock sound of bands breaking ground in the music industry today. Yet, there is a dreamy tone to the melody of the music that brings back memories of the early days in the Beatles music. If you're a fan of the Beatles or the early 60's & 70's pop rock era and you've never heard of Red Martian, then you're in for a treat! This is a band that you can add to your music collection and fall in love with their songs just as you have with the music that you've known and heard for many years. The music has energy and will have you tapping your feet to the beat. Then they slow it down and sooth you with mellow tunes that will let you drift away in to a state of relaxation and contemplation.
Ghost into the Fog is an album that will be a nice addition to any music lover's collection. The band enjoyed working with the well-known producer, Gordon Raphael. Whom has produced bands like Strokes, Regina Spektor, & Sky Cries Mary just to name a few. You'll immediately hear the care and quality that went into every step of the recording process to make the album timeless and cherished by all that hear it's music. Take a moment to treat your ears to the sound of Red Martian, there's a song on the album that will resonate with you.
Red Martian | Tracking in the Studio
album produced by Gordon Raphael
1/2" tape recorder
Red Martian | In the Studio
5 Steps to Getting Your Music Licensed | Step 5
Now that you've done a load of leg work to get your music out in the public and build a strong web presence, you need to focus on your fans. Gathering fans is like a wildfire, it can spread quickly or burn out in the blink of an eye. You need to keep your fans engaged in what you're doing as a band. This requires some attention to your social media content and the pace at which you release music and music videos.
Be sure to announce when you are going to release music and videos. Just as you would promote a show, you need to promote your music releases. Record Labels and licensing firms like to see that you are supplementing your hard work with an effort to reach out to the public and let them know about what you've been doing. Get in the habit of taking photos at band rehearsal and at recording studios. Post them on your social media and keep your fans engaged in every step of the process that you're taking to compose and create music. When you have a consistent following, it will grow and spread like a wildfire throughout social media. If there is a buzz about your band, then people will hear about you and at least get some exposure to you and your music. If you think your music is just that good and people will find you anyway, you're in for a rude awakening.