
Music reviews
&
helpful information about recording and mixing techniques. Posts written by professional engineers and musicians.
Learn about the inside secrets that engineers at Shine On Studio use in their sessions. Become a mixmaster and impress the world with your knowledge of audio production.
Gain Staging
Advice on how to make good use of the meters in your DAW and learn how to properly read them.
Getting the right levels in your mix is the very first part of the recording process. Paying attention to your input levels can pay dividends when it comes to the mixing process. Proper levels will yield a much more streamlined workflow when it comes to sitting down to mix.
So you maybe asking yourself, “What are the proper levels that I should be trying to achieve?“
The answer to this question can vary. You have to have a vision for the end result. If you don’t have that vision, then you should focus on getting levels that optimize your A/D converters. Most interfaces are calibrated for a sweet spot around -20dBFS to -16dBFS. Hitting this area as your target RMS level will almost always give you ideal tracks to mix.
Now if you’re sitting there scratching your head and not quite sure what all that means, don’t worry. Here’s a good rule of thumb to follow. Most meters in DAWs have a color coded display. Typically green is at the bottom followed by yellow, orange, and red. If you get your average level to hover right around where the green and yellow meet, then you’re in the ballpark. This means the middle point between your peak levels and your noise floor is close to that point where the meter changes colors.
Now of course it depends on what you’re recording. Different types of sound sources are going to give you different levels. Drums are going to have very sharp attacks that will yield higher peaks. Where as a vocal that isn’t too dynamic may just hover in the same area with little movement. One of the biggest problems that I see other engineers make is the level of their monitoring. Having your monitors up too loud or down to quiet will not truly give you a representation of the signal level. This is why you have to trust the meters and your DAW and let them show you what is actually happening with you levels. These are just pretty lights for you to look at while you’re working on your tracks. These are useful tools that can mean the difference between a good or bad mix.
It’s always a good idea to leave yourself some headroom when you’re tracking. You will want to have some space to mix and that is virtually impossible when your input levels hit -3dBFS or higher. Just be reasonable when you set your levels and keep in mind that you will be blending multiple tracks to mix down to your final print track.
Producing Music - Where to start
Producing is the construction of music. You have to make choices about the project as a whole and this will include things like EQ, panning, compression, lengths of the delay, when to delay, when to chop up the vocals, when to add guitar solos, how the song begins and ends, and everything else that happens in between. This is not an easy task, but it does have huge rewards that are long-lasting if you do it right.
Producing music is something that takes time to craft and comes with lots of experience. If you're one of the gifted few that can just produce w/o experience, you may still get some insight from this post.
Producing is the construction of music. You have to make choices about the project as a whole and this will include things like EQ, panning, compression, lengths of the delay, when to delay, when to chop up the vocals, when to add guitar solos, how the song begins and ends, and everything else that happens in between. This is not an easy task, but it does have huge rewards that are long-lasting if you do it right.
To achieve this goal, you need to do a bit of homework. Start by listening to some of your favorite music. Pay close attention to all the little details. Take notes on when each instrument comes into the mix and where it is panned in the stereo spectrum. Then pull apart the mix in small bits as you explore every aspect of the sound. A well-produced mix has many layers and when you examine each layer, you will understand how the producer constructed their masterpiece.
To keep you on the right track, start reading some books about producing that have been written by the masters. "Behind the Glass" is a great perspective of what it's like for producers working in the world's biggest studios with some of the most famous musicians. Gain some insight on what will be ahead of you before you cross that bridge.
Once you think that you have a good grasp on how to produce, go and find a small band that is just starting out and see if you can produce them. If you can produce a band that has very little experience in the studio, then you're ready to start your career as a producer. It is no easy task to work with musicians that have never worked with a producer. If you succeed, that is one of the most difficult hurdles to overcome. You've got a lot ahead of you and the rest will fall into place as you move along. You may not succeed right away. In fact, it will take time to get settled into the role. Keep plugging away at the challenges that arise and you will find ways to overcome them.
If you want to start even smaller, just try to produce one song on your own. Do some MIDI composing and get some samples together. See how long it takes for you to come up with the melody and rhythm. This will give yo some insight as to how long it will take when you work with other musicians on their production.
Using Playlists in Pro Tools
Learn more about how to get the perfect take for your vocal recordings using the playlist feature. Get your sessions more organized and utilize your engineering powers to be more efficient in the studio. Click on the post title for the full article.
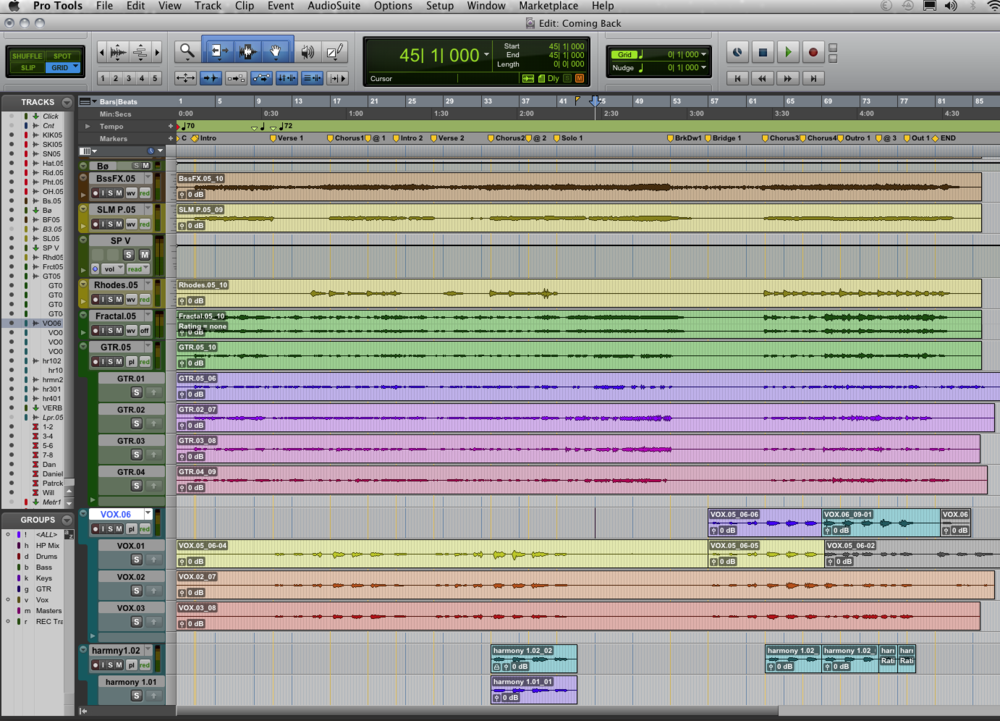
Playlists feature in Pro Tools
There are times when you need to be a powerful audio engineer and knowing your tools is ever so crucial.
Pro Tools is by far the most powerful DAW on the market. No other DAW is even close to offering the same ability to streamlining a workflow for professional use in the studio. I've tried to use Logic and Studio One, but they just don't offer the speed and professional touch that I need when it comes down to tracking and mixing clients that need to be meticulous with their production.
I've spent years behind the console and doing endless takes on vocal tracks. Now that I've had the experience of working with multiple DAWs, I'd always turn to Pro Tools for the ease and professionalism that is available. It's not even a competition in my opinion. Being able to pull up multiple playlists with ease and then auditioning them with the track is just so convenient in Pro Tools.
Now utilizing the playlist feature is the first step. I've had many sessions come to my studio in the past few months and almost none of them took advantage of the playlist feature. This is just a shame and makes me ever so sad. Punching in is a part of studio life and it is a good way to make sure you get a solid performance out of the musicians. Yet, there is a slim chance you will get an excellent mix out of a session if there is only one vocal performance to mix. The best tactic is to let the vocalist do multiple takes of the track and let them focus on a linear performance. Keeping them in the moment and capturing the emotion of the track is your job. If you are starting and stopping the performance, it will come out disconnected and lack the flow to keep the music moving.
So here is where you start, let the vocalist do an entire take of the song from beginning to end. This can be a scratch track, but orient yourself to the flow and the emotion that the vocalist puts into the track. The most important thing is to just sit back and listen. Don't stop the recording for any reason. Well, unless the vocalist stops singing or asks to stop, but then start them back up again. Once you have this first main track, you can now discuss the road map for how you want to record the rest of the takes. Some vocalist will want to break down the recordings by verse or even by line. I'd suggest that you at least get them to do whole takes of the verses and chorus.
With every pass of the recording, be sure to create a new playlist. You can do this by clicking the drop down menu just to the right of the track name. Choose the "new" option to create a new playlist for recording. There will be a pop up window that asks you to name the track. Just let it auto-name the track and it will add .01 to the end of the track name. This will increase to .02 for the next take and so on. This will be an easy way to keep track of the takes and allow you to streamline your mixing after the recording is finished.
To make sure you have enough material to work with during mixing, I usually suggest at least 3 takes of vocal recordings. However, you can do as many as you feel is necessary or that the vocalist wants to track. Next post we'll get into more of the editing side of the playlist feature.
Selecting mics for recording live drums | Overhead Mics
Selecting the right Mics for a live drum recording can be a difficult decision. Drums tend to have an unique sound for each individual kit. You also have to take into consideration the style of drumming. The drummer is just as much a part of the kit, so based on how the drummers plays the kit should factor in to your decision.
Overhead mics are by far the most important decision you make when deciding to record drums. About 75% of your audio will come from the overhead mics. Overhead Mic placement is also a big factor whether you do a symmetrical or asymmetrical mic placement.
Condenser mics are usually the first choice for overhead mics on a drum set, however many engineers have had lots of success using dynamic microphones for their overhead mics (OH). The goal is to capture the essence of the drum kit. Putting the drums in the mix to set the mood for the music is the goal. How you sculpt your sound will define your ability to record and mix a quality production.
I like to treat drums as a single instrument and not a bunch of individual instruments. This way I can place mics where they are most beneficial to the recording. Sometimes I'll mic each of the rack toms + overheads + a Beta 52 on the kick. This will give me a more snappy and punchy sound to the kit that is great for a song that needs strong dynamics and percussion. Other times I'll just use a SM57 on the snare + Overheads + an AKG D112 on the kick for tracks that are jazz flavored. These are just a few examples, but versatile dynamics for the type of drums that will fit in the mix.
You can always place mics and then decide if they are relevant to the mix. Just watch out for phasing and over-ambience. The more mics in the mix, the more likely you'll have phase problems or what I like to call a foggy mix. Try starting your mix with just the overhead mics and mute all other mics. Listen to what the OH mics are providing and then slowly bring in the other mics. You should filter and EQ each mic so it fits in with the OH mix. If the signal is weak or disappears, then invert the phase to see if the track is out of phase with the OH track.
There's more to cover, so I'll open this topic up for Q's and discussion. Leave a comment below to add any insight you'd like to share.
Multiple mixes will always yield a better album
Multiple mixes of a song is a technique that I've developed over the many years of my career. Music tends to unfold differently every time you approach a mix. If you're using a program that allows you to save or save as multiple times, such as ProTools or logic, it's not a bad idea to try a new mix even if you think you nailed it the first time.
Here's how I like to set up my sessions. After I record, I like to save the session as just a raw track that hasn't been mixed. Then 'save as' the name of the track_mix1. This way I have a template to go back to when I want to create a new mix. You can repeat this process as many times as you like. I usually tend to think at least three mixes is a good reference point to determine whether or not you like a mix. Sometimes it's a good idea to try up to 10 mixes.
Try this, set up a timer and give yourself a time limit for the mix. Anywhere between 10 to 15 minutes should be enough time to get a good rough mix. When the timer goes off, save your mix session, close it, & open a new session.
After you feel that you've made enough versions of the mix, go back and review each of the mixes. You can bounce each of the mixes down as an MP3 file and put them on your phone or MP3 player. Then go for a run, take a drive, or head over to a friend's house and listen to your mixes outside of the studio. This will give you a reference point as to which mix is probably the best and/or if a few mixes should be worked on and handed to a client for review.
Try this technique on your next mix and see what happens. You may be surprised that the third or fourth mix is actually the one that you wind up keeping.
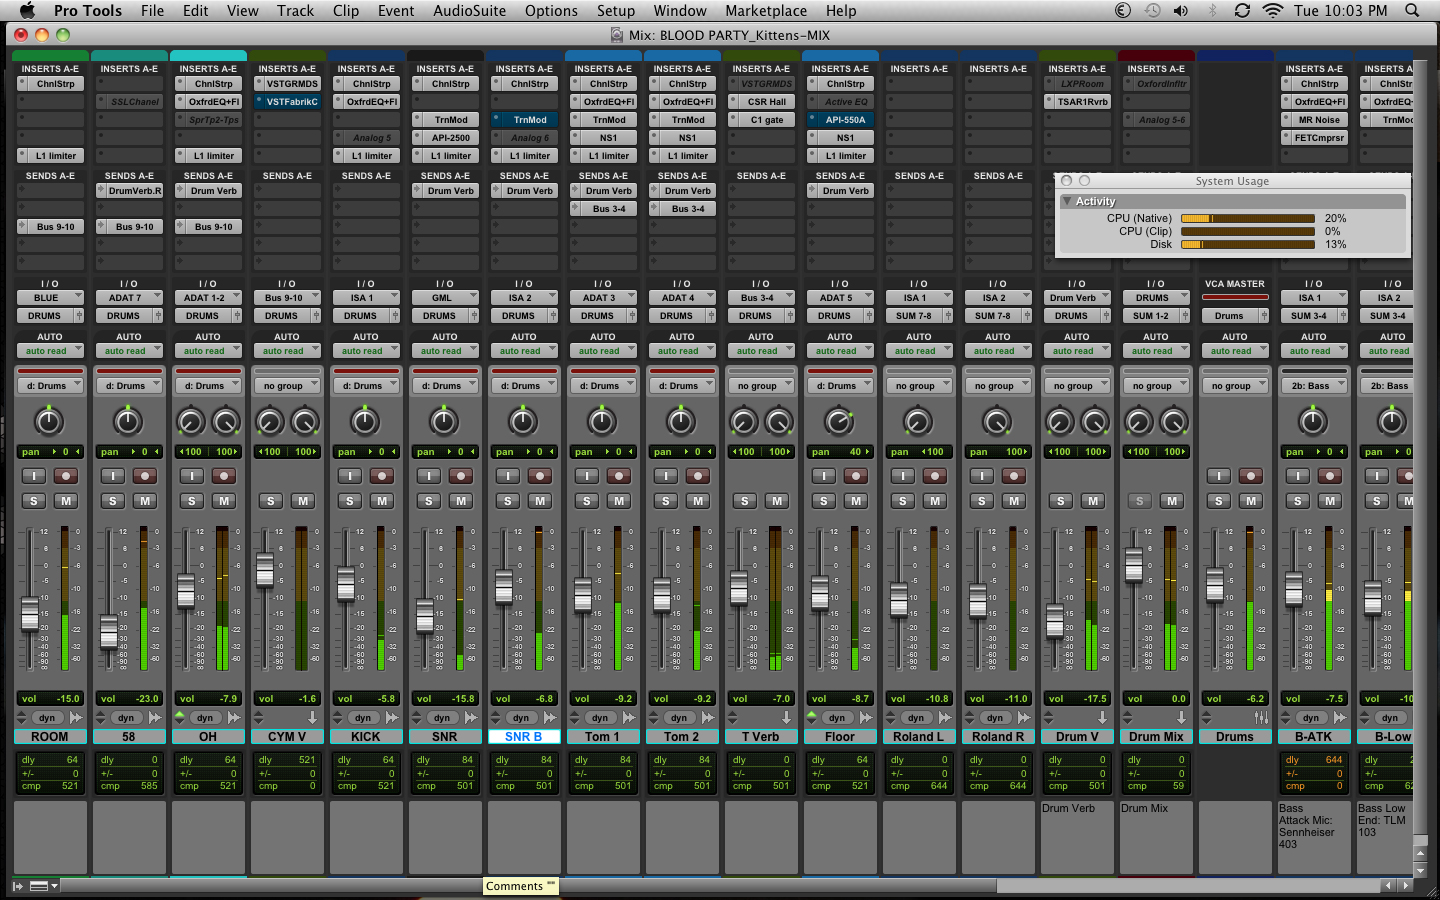
Turn your speakers up, not your meters
If I had a nickel for every time I had to turn down levels on the tracks I receive when I'm doing a mixing session, I'd be a millionaire. If you want to hear what your mix sounds like at a louder volume, try turning up the volume on your monitors first. Don't push the faders all the way up or use a compressor/limiter, you're only doing damage to your mix.

Set up a reference track! Just import your favorite song into your DAW session and listen to it through the monitors. You have an idea what that song sounds like so you can use it as a reference point to calibrate your system and get a good point of reference for your mix. Mixing without a reference track is like driving a car blindfolded. Not a good idea.
Most DAWs come with a metering plug-in or a metering software program. Use it! It's there for a reason. Metering helps you get a good idea of how loud your mix actually sounds. If your DAW doesn't show RMS levels, there are a bunch of programs out there that are free and will give you a good reference point for your RMS levels. Try and give each of your mixes at least 10dB of dynamic range. If possible, give your mix anywhere between 15dB to 20dB of dynamic range. You'll notice a huge difference in the audio quality of your mix if the dynamic range has lots of room to breathe.
Louder is not better if your mix has a bunch of digital distortion. If no one will listen to you music, it's probably not the content, but rather the lack of quality mixing that was put into the music. Take the time to give your music a real good listen. Critical monitoring is so important to making sure that you get a good mix. Don't over compress and don't smash your limiter or compressor so that your meters are all the way maxed out at 0 dBFS.

AVID HD OMNI
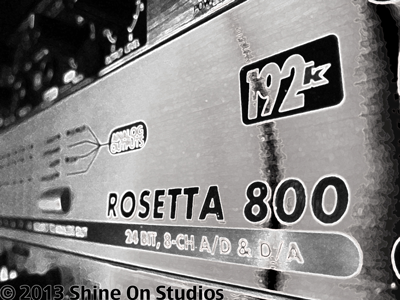
APOGEE ROSETTA 800 w/ XHD option
Shine On Studios is proud to announce the addition of the AVID HD OMNI system to our studio. This top-of-the-line HD interface for Pro Tools HD offers pristine A/D & D/A conversion with two high-end mic pre-amps. Paired with our Apogee Rosetta i/o, we now offer 8 additional channels of HD recording!
The studio is sounding better than ever. Tracks are clean and punchy! The clarity is amazing and Pro Tools 10HD offers our engineers so many ways to enhance and mix tracks. Everything from Elastic Audio to extremely low latency, gives every track produced at the studio that professional touch that makes them shine!