
Music reviews
&
helpful information about recording and mixing techniques. Posts written by professional engineers and musicians.
Learn about the inside secrets that engineers at Shine On Studio use in their sessions. Become a mixmaster and impress the world with your knowledge of audio production.
Gain Staging
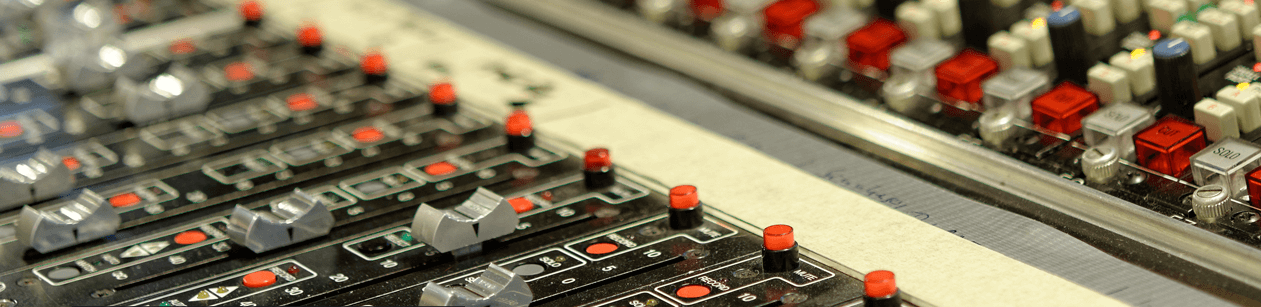
Advice on how to make good use of the meters in your DAW and learn how to properly read them.
Getting the right levels in your mix is the very first part of the recording process. Paying attention to your input levels can pay dividends when it comes to the mixing process. Proper levels will yield a much more streamlined workflow when it comes to sitting down to mix.
So you maybe asking yourself, “What are the proper levels that I should be trying to achieve?“
The answer to this question can vary. You have to have a vision for the end result. If you don’t have that vision, then you should focus on getting levels that optimize your A/D converters. Most interfaces are calibrated for a sweet spot around -20dBFS to -16dBFS. Hitting this area as your target RMS level will almost always give you ideal tracks to mix.
Now if you’re sitting there scratching your head and not quite sure what all that means, don’t worry. Here’s a good rule of thumb to follow. Most meters in DAWs have a color coded display. Typically green is at the bottom followed by yellow, orange, and red. If you get your average level to hover right around where the green and yellow meet, then you’re in the ballpark. This means the middle point between your peak levels and your noise floor is close to that point where the meter changes colors.
Now of course it depends on what you’re recording. Different types of sound sources are going to give you different levels. Drums are going to have very sharp attacks that will yield higher peaks. Where as a vocal that isn’t too dynamic may just hover in the same area with little movement. One of the biggest problems that I see other engineers make is the level of their monitoring. Having your monitors up too loud or down to quiet will not truly give you a representation of the signal level. This is why you have to trust the meters and your DAW and let them show you what is actually happening with you levels. These are just pretty lights for you to look at while you’re working on your tracks. These are useful tools that can mean the difference between a good or bad mix.
It’s always a good idea to leave yourself some headroom when you’re tracking. You will want to have some space to mix and that is virtually impossible when your input levels hit -3dBFS or higher. Just be reasonable when you set your levels and keep in mind that you will be blending multiple tracks to mix down to your final print track.
Producing Music - Where to start
Producing is the construction of music. You have to make choices about the project as a whole and this will include things like EQ, panning, compression, lengths of the delay, when to delay, when to chop up the vocals, when to add guitar solos, how the song begins and ends, and everything else that happens in between. This is not an easy task, but it does have huge rewards that are long-lasting if you do it right.
Producing music is something that takes time to craft and comes with lots of experience. If you're one of the gifted few that can just produce w/o experience, you may still get some insight from this post.
Producing is the construction of music. You have to make choices about the project as a whole and this will include things like EQ, panning, compression, lengths of the delay, when to delay, when to chop up the vocals, when to add guitar solos, how the song begins and ends, and everything else that happens in between. This is not an easy task, but it does have huge rewards that are long-lasting if you do it right.
To achieve this goal, you need to do a bit of homework. Start by listening to some of your favorite music. Pay close attention to all the little details. Take notes on when each instrument comes into the mix and where it is panned in the stereo spectrum. Then pull apart the mix in small bits as you explore every aspect of the sound. A well-produced mix has many layers and when you examine each layer, you will understand how the producer constructed their masterpiece.
To keep you on the right track, start reading some books about producing that have been written by the masters. "Behind the Glass" is a great perspective of what it's like for producers working in the world's biggest studios with some of the most famous musicians. Gain some insight on what will be ahead of you before you cross that bridge.
Once you think that you have a good grasp on how to produce, go and find a small band that is just starting out and see if you can produce them. If you can produce a band that has very little experience in the studio, then you're ready to start your career as a producer. It is no easy task to work with musicians that have never worked with a producer. If you succeed, that is one of the most difficult hurdles to overcome. You've got a lot ahead of you and the rest will fall into place as you move along. You may not succeed right away. In fact, it will take time to get settled into the role. Keep plugging away at the challenges that arise and you will find ways to overcome them.
If you want to start even smaller, just try to produce one song on your own. Do some MIDI composing and get some samples together. See how long it takes for you to come up with the melody and rhythm. This will give yo some insight as to how long it will take when you work with other musicians on their production.
Black Lion Audio Signature 002 Mod
There are certain things that contribute to a great recording. The first is the interface that you're using. You can go and spend some $$$ on a HD converter and get great results. However, there is an alternative for great sound at a more affordable price. Black Lion Audio (www.blacklionaudio.com) is a company based in Chicago and they have some modifications that rival some of the big expensive converters. For under $2,000 you can get the BLA Signature Mod on your 002 or 003 rack. We currently have one that is used as our mobile rig and it holds up quite well. Many of the live recording that Shine On has been hired to record have been tracked with our modified 002r.
The Signature Mod will improve your converters, clock, and mic pres. These are huge improvements over the Digidesign stock interface. They also beef up the headphone amp to provide a more accurate monitoring option. The A/B recordings we did with the interface are jaw-dropping. There really is no comparison between the recordings. The mod improved the attack of transients and the depth of the EQ range. Drums have more punch, guitars roar and scream with more intensity, bass is bigger and richer in the low end, and vocals just rip through the mix to sit right in the pocket. These improvements are well worth the investment. You'll save time in the studio and your mixes will have a brilliance that just cannot be matched at this price point. If you'd like to get more info or experience with the interface, sign up for one of our Pro Tools lessons and an engineer will show you the ins and outs of this impressive upgrade to your studio.
Behind the Scenes | Recording Engineer Clean Up Work
The recording engineer's work is not done after the session is over. The engineer must spend time working on the audio files to clean up unwanted noise in the files and make sure that fades are properly applied to smooth transitions. Back up copies need to be made and even though the engineer doesn't sit there and watch the computer transfer files, the engineer has to wait and check after the transfer is done to make sure that all the files transferred properly.
I'm usually in the studio hours before a session to check on timing issues and pitch correction. Returning to a session after taking some time off allows me to hear the tracks again with fresh ears. This way I'm more likely to catch little mistakes and focus on the recording's blemishes. This also gives me time to focus on ways to approach and produce the recording. I usually take this time to make notes for mixing the tracks. This way I am prepared for mixing as soon as the client arrives at the studio. If any re-tracking is required, will usually start there and then proceed to mixing. It's the little things like this prep work that keep my clients happy and keep them coming back to record more at Shine On Studio.
Pro Tools Lessons at a pro studio
Now is a great time to start your Pro Tools education and kick-start your audio production career. Learn the basics all the way up to advanced mixing & mastering. Get a hands-on feel for how the audio production industry works on a daily basis by sitting in on live recording and mixing sessions. Shine On Studio offers many different options for ProTools lessons.
Our hourly lessons allow you to pick up or start wherever you are with your Pro Tools knowledge. You can set up time to meet with an engineer and review any part of ProTools recording or mixing techniques that you would like to learn. This is a great option for those that just need to fine tune certain skills or that just want to get into the Pro Tools community.
For those that are looking for a more in-depth approach to their Pro Tools education, our apprenticeship program is a great opportunity. Apprentices will get plenty of one-on-one time with an engineer to build their knowledge of how to set up sessions, place microphones, use digital and analog effects, build multiple mix templates, and a whole lot more. Apprentices get to sit in on recording and mixing sessions to see exactly how an engineer handles the daily workflow.
Please visit our webpage on ProTools lessons or contact the studio for further details. Now is a great time to start your ProTools education and move your career in a new direction.