
Music reviews
&
helpful information about recording and mixing techniques. Posts written by professional engineers and musicians.
Learn about the inside secrets that engineers at Shine On Studio use in their sessions. Become a mixmaster and impress the world with your knowledge of audio production.

Mixing | Keyboards & Synthesizers
Keys and Synths are line level instruments that typically come directly into your console without amps being mic'd up. Let's discuss a little bit about running DI lines into your preamps or interfaces.
Keys and synths can appear to be an easy task to mix. They have dedicated outputs and don't require microphones. This very fact is what makes them difficult to tame sometimes. Their EQ spectrum can be all over the stereo field and this can make them unruly when it comes time to mix. My approach is to save the keys & synths for last. I like to mute them and address the drums, bass, guitars, & vocals first to get a nice even balance. Then the keys are like the icing on the cake. They layer a nice thick sound over the mix and it allows you to use surgical EQ to get the pockets filled to your taste. Keys are sometimes the glue that pulls a mix together and sometimes they cloud up the mix and make it murky.
Approaching keys with care can give you more control over the final balance of the mix. In some mixes, it would be a good idea to add some light delay on a 16th note. This can give the appearance of a wider sound for the keys in the mix.
Piano tracks typically benefit from proper EQ and a silky sounding reverb. The mood of the track will lead you to what style and depth of reverb to use. I love to hear a dark reverb with long tails, so I like to use a low pass filter on the reverb return. This allows the initial attack of the bright notes to shine with a very pleasing trail of dark tones following behind them.

Mixing Guitars | Solos
Guitar solos need to pop and stand out in a mix. They're the pinnacle or crescendo of a song in many cases, so they need to have that grand finnale attitude. Let's dive into a discussion about mixing guitar solos.
The guitar solo is the peak of the performance. The solo can catapult the song into the top spot on the charts. So let me take a moment to explain some techniques for mixing a good solo.
Solos usually come in towards the end of a song, so there is some build up to the solo. Rhythm guitars are laying the foundation for the solo to be built upon. Don't let the rhythm guitars steal any thunder from the solo guitar. Automate an EQ low pass filter to roll off some of the rhythm guitar's shimmer. This will open up space in the audio spectrum for the solo guitar to shine a bit more brightly.
Pan the solo guitar off to one side. If the vocalist is doing anything vocally over the solo, pan them to the opposite side. Try to isolate the solo guitar as much as possible to make it pop out of the mix. The panning and EQ can all be automated and this will allow a smooth transition in and out of the solo.
Adding a delay to the solo is a great way to make it sound bigger. If you've got the solo guitar panned to the right, then pan the delay to the left. A quarter note delay is personally my favorite, but use a delay setting that compliments the music. Use filters to shape the tone of the delay and make it appear to drift off into the distance. Roll off the low end up to 400Hz and pull back the highs to around 9KHz. If your delay has a feedback setting, adjust it to taste for the echo effect you desire.
These techniques should give you a good starting point to make your solos shine and get all the attention they deserve. Please leave any comments or questions and I'll get back to ASAP.

Recording Drums | What Preamp to Use
Tracking drums is an art form that takes time to develop. Choosing the right preamp to pair with your studio setup is never an easy task. There are so many options out there and it can seem a bit overwhelming. This article dives deeper into some of the options available and I give you some personal advice on the preamps that I like to use for drum recordings.
Your preamp collection will constantly grow as your studio expands. Acquiring different types of preamps will give you more options on how to shape your sound and tone. Transistor preamps can give you a nice sharp sound that cuts through a mix and brings out the attack of transients. Tube preamps can give you a gritty or distorted tone that is saturated with all of those impressive characteristics of old analog recordings. Then there are preamps that blend the transistor clarity with the tube warmth to allow you to dial in the right amount of tone for your mix.

A new preamp on the market is the Warm Audio WA273-EQ. This is a clone of the coveted 1073 preamps that have defined the sound of rock music. A stereo pair of these on your overhead mics and you're all set to track slamming drums. You could add this to your existing rig and find many different ways to get the tone that you want out of it. I've used this on just the kick and snare to get big powerful tracks that sit just perfectly in the mix. The built-in EQ allows you to shape the tone as your recording and really cuts down on the post-production work. I've done EP and demo albums for bands in less than 4 hours because this preamp takes all the guesswork out of post-production. This preamp is one of my Swiss Army tools that can be used on tracking virtually anything, but drums are articulatly sculpted with these discrete premaps.
Tracking drums is an art form that can take years to develop as you experiment with different combinations of gear. Mic selection is a major factor, but for this article, I'm just going to focus on the preamp selection. The first thing you have to consider is the context of the song. Your preamp choice will mostly revolve around the mood and performance of the song you'll be recording. Jazz and Blues tracks are usually mellow and have a little fuzz on the drums. In these recordings, I lean towards my tube preamps to give me that coloration to blend the drums into the mix. Rock & Pop songs like strong transients, so lean more towards my transistor preamps. Preamps can be mixed and matched. Try tube preamps on your Kick & Snare with transistor preamps on your Overhead mics. This will give you a nice blend of the tones.

The Universal Audio Twin Finity preamp is a workhorse in the studio. The tone blend between tube and transistor make this a must have preamp for every studio. Use this preamp on your kick drum and just by moving the tone blend pot, you can hear the transients saturate or sharpen. I'd suggest you add this preamp to your wish list this year. If you want a little more bang for your buck, check out the UA 4-710d. This is a 2u rack mount version with 4 Twin Finity preamps that also have an 1176 style compressor built into each channel. A very versatile preamp box that gives you 4 options to shape and sculpt your drums.

The Manley Force is another excellent choice for a versatile tool in the studio. The headroom on these preamps is immense. Making it possible to use ribbon mics for your overheads or room mics. Built in HP filters and impedance selectors allow you to get the warmth you want matched with the mic your using. The Manley Force is more than a drum preamp, it offers many useful features for tracking all instruments, so this should be on your radar as you upgrade your studio.
Hope these tips and recommendations give you a better idea on how to strengthen your studio. Happy recording!
Using Playlists in Pro Tools
Learn more about how to get the perfect take for your vocal recordings using the playlist feature. Get your sessions more organized and utilize your engineering powers to be more efficient in the studio. Click on the post title for the full article.
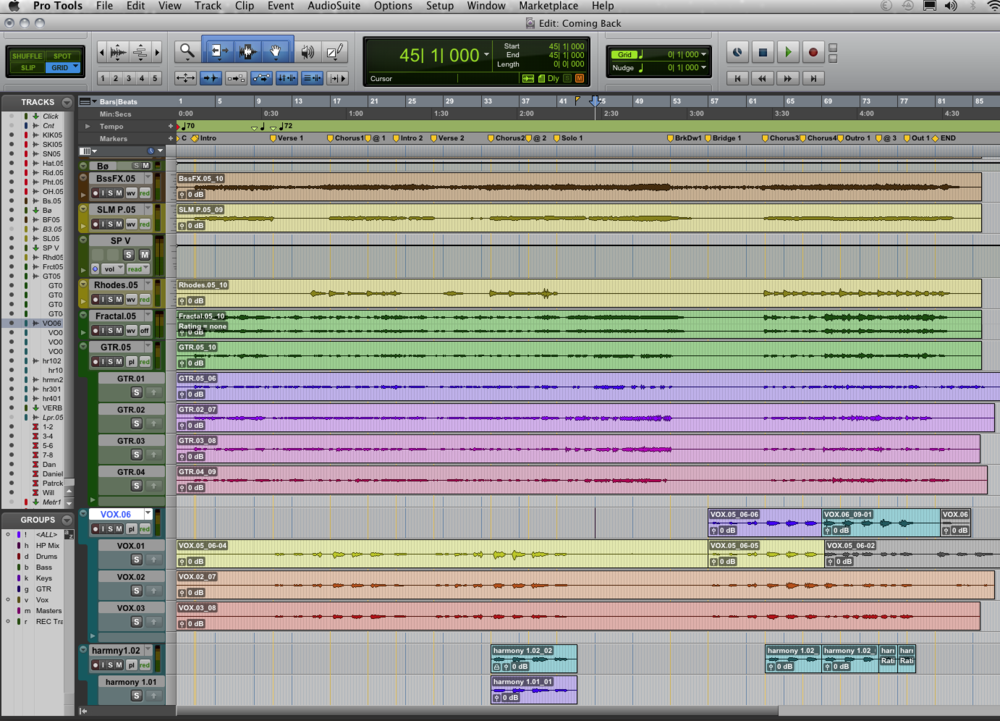
Playlists feature in Pro Tools
There are times when you need to be a powerful audio engineer and knowing your tools is ever so crucial.
Pro Tools is by far the most powerful DAW on the market. No other DAW is even close to offering the same ability to streamlining a workflow for professional use in the studio. I've tried to use Logic and Studio One, but they just don't offer the speed and professional touch that I need when it comes down to tracking and mixing clients that need to be meticulous with their production.
I've spent years behind the console and doing endless takes on vocal tracks. Now that I've had the experience of working with multiple DAWs, I'd always turn to Pro Tools for the ease and professionalism that is available. It's not even a competition in my opinion. Being able to pull up multiple playlists with ease and then auditioning them with the track is just so convenient in Pro Tools.
Now utilizing the playlist feature is the first step. I've had many sessions come to my studio in the past few months and almost none of them took advantage of the playlist feature. This is just a shame and makes me ever so sad. Punching in is a part of studio life and it is a good way to make sure you get a solid performance out of the musicians. Yet, there is a slim chance you will get an excellent mix out of a session if there is only one vocal performance to mix. The best tactic is to let the vocalist do multiple takes of the track and let them focus on a linear performance. Keeping them in the moment and capturing the emotion of the track is your job. If you are starting and stopping the performance, it will come out disconnected and lack the flow to keep the music moving.
So here is where you start, let the vocalist do an entire take of the song from beginning to end. This can be a scratch track, but orient yourself to the flow and the emotion that the vocalist puts into the track. The most important thing is to just sit back and listen. Don't stop the recording for any reason. Well, unless the vocalist stops singing or asks to stop, but then start them back up again. Once you have this first main track, you can now discuss the road map for how you want to record the rest of the takes. Some vocalist will want to break down the recordings by verse or even by line. I'd suggest that you at least get them to do whole takes of the verses and chorus.
With every pass of the recording, be sure to create a new playlist. You can do this by clicking the drop down menu just to the right of the track name. Choose the "new" option to create a new playlist for recording. There will be a pop up window that asks you to name the track. Just let it auto-name the track and it will add .01 to the end of the track name. This will increase to .02 for the next take and so on. This will be an easy way to keep track of the takes and allow you to streamline your mixing after the recording is finished.
To make sure you have enough material to work with during mixing, I usually suggest at least 3 takes of vocal recordings. However, you can do as many as you feel is necessary or that the vocalist wants to track. Next post we'll get into more of the editing side of the playlist feature.

Recording vocals right the first time
Vocals are the most important part of a recording. Over the years, I've heard some bad recordings that are wildly popular. It boils down to the vocals. If the lyrics and the emotion is just right, than the song will be a success. Now you should spend some time working on the music. I'm not saying that all you have to do is produce vocals, but do give the vocals the most attention.
Start by recording a very rough scratch track and than take a few moments to listen to the context of the vocals with the music. Does the feel of the track have the flare that you're seeking? Do the vocals sound like they carry the listener through the song? In some cases, it may be good to re-write some of the lyrics to convey more emotion or to mold into the music a bit more. This is a golden opportunity to figure out how the delay and reverb will be used to treat the vocals. Sometimes, the style of delay may lead you to a different style of singing or even slimming down some of the lyrics.
Now of course this technique is dependent upon the context of the song, yet I've used this approach on many tracks with great success. Next post I'll discuss more about mic placement and tracking scenarios.
The effort it takes to run a recording studio
The dream has been achieved! I am living the life I've always wanted and it feels great to work in my own studio everyday. The rewards are tremendous and there is nothing I'd rather be doing with my time. Being so immersed in my work on a constant basis has given me the knowledge and experience that is required to work at a professional level in this industry. I know many of you are looking to attain the same goal, so let me share just a fraction of my awareness with you.
First, running your own business, regardless of what you do, is no easy task. There are quite a few things you need to consider before diving into starting up a recording studio. Consider this, you'll need to cover your overhead and start up costs before you see a dime of profit. The initial investment is what overwhelms most entrepreneurs and that is just the tip of the iceberg. You're going to need a computer that is powerful enough to handle the processing, a DAW software program, an interface, lots of cables, mics, mic stands, headphones, headphone mixers, racks for gear or road cases, power conditioners, external hard drives, and potentially a studio space. This is just the foundation, there are plenty of other bells and whistles that you'll need to pull off a professional studio.
Now that that idea is rattling around in your head, tackle this notion, you will need to budget for electricity, water and sewage, garbage service, insurance, a security system, and rent. So your budget on a monthly basis is around $2,000 just to keep the doors open. That's the cheap end of the spectrum, which will probably not be adequate enough to compete in the market.
Now if you've invested a large chunk of change into an education in audio production, owning your own studio is the ultimate goal. These startup and recurring monthly costs are just scratching the surface of what you need to consider for operating a steady and reliable studio business. I just wanted to get your mind in motion for all that needs to be considered. Check back in soon as my next few posts will dive deeper into the elbow grease that is needed to keep a studio running smoothly and having the stamina to build a solid reputation to keep the machine well oiled.
5 Steps to Getting Your Music Licensed | Step 2
Now that you have chosen the best song to market, you need to prepare it for presentation. This next step is definitely the most important, it's time to record your music. The "sound" of your music will be the foundation of your marketing campaign. So this is where you need to slow down and evaluate the best option for moving forward. You need to invest and believe in your music, so you need a quality recording with a producer that shares your vision. Cutting corners on recording your music will hinder the success of your efforts and only wind up costing you more money in the long run.
The main focus is to get a high quality recording to exemplify the ingenuity of your musical abilities. To achieve this, you need to make sure that you're recording is done right the first time. Saving a few bucks on a unprofessional recording will only add to the cost that you'll wind up investing when you go to a professional studio and get a higher quality recording. If you want to be the best at what you do, then you need to work with professionals who can give you top quality production. Project / budget studios are great for demos and hashing out ideas, but when it comes to making the final recording, you need to invest in quality. You will only get one chance to make an impression, so there is no time to waste on mediocre sound.
When you spend all your time trying to get licensed, the music has to be spectacular. If the recording is sub-par, it will reflect poorly on the content of your music. A good engineer / producer will have the skills and knowledge to ensure your music pops! Choose a studio with a proven track record and an engineer that has serious interest in your music. A good engineer will encourage you and support you along the way. Getting guidance from someone who has experience in the industry is a wise choice. This will help you avoid common pit-falls an maximize the efficiency of your production time.
Stay tuned for step 3. We'll cover the advantages of preparation and time management.
Building a Home Studio | Top 10 Microphones
Thinking about getting a microphone to start or build on your home recording studio? Here are 10 mics you should consider. Ranging from Dynamic to USB mics that are great for singing or podcasting.
Microphones are the pulse of a studio. They capture the sound and deliver it to the interface. This is the first point of contact where the sound is captured and harnessed to be preserved for eternity in the digital realm. Every mic has its advantages and disadvantages. In the right situation, a good recording can be made with a handful of SM57s and one large diaphragm condenser.
Now you may want to build a vocal studio or a full-production studio for instruments. Either way, you're going to need some mics that will get the job done. I've put together this list of mics to help you get started. These mics range in price and offer many different levels of quality. Based on what you want to record, I'd say stick to a budget that isn't going to deplete your bank account.
If you are on a tight budget or don't want to spend a lot of money on buying all the gear, I've got the solution for you. The Neewer line of mics comes with everything you will need. The kits include a mic, cable, table clamp arm, windscreen, and pop filter. This will literally get you going right out of the box. If you download a recording program like Audacity, you can be up and be running for under $50 total. This is just insane! The NW-700 model gets you in for $23. You can upgrade your setup to the NW-1500 for $36. These prices are very reasonable and you will have something to get the ball rolling and figure out if this is the path you want to take. Now lets move on to the more sophisticated and more professional mics.
If you're going to be doing Voice Over work for TV or radio commercials, the Shure SM7B is the primary mic you should be considering. This mic has become legendary in the world of VO production. I use the SM7B to narrate all my YouTube videos. This mic has the iconic Radio Station look and is great for recording vocals on music tracks, too. This is a dynamic mic, so you need to get right up on it for good presence. It has a built in High-Pass Filter and a presence boost. You can select either of these options directly on the back of the mic. This allows you to tailor your recordings right from the source. With the additional foam windscreen cover that comes with the mic, this is the best option for anyone getting serious about vocal recordins of any kind. As a perk, this mic is also a great option for recoridng guitar amps.
The Shure SM57 is a tank & a workhorse. It's great for recording almost everything. This dynamic mic can take a beating and still give you great recordings. It's ideal for recording snare drums and guitar amps. Each SM57 has a different sound, so it's a good idea to have a few in your mic locker. These mics are $89 each, so you can get 3-4 and use them for more than just mono recording. If you place them properly, you can put a few on a guitar amp and get a huge sound!
Focus on getting a decent vocal mic that can be universal for other applications. The RODE NTK is a great place to start and will be a handy mic to have when you start to build up your mic collection. This large-diaphragm tube mic has warmth and character that gives vocals the texture they need to fit nicely into a mix. RODE has a long lasting reputation as a microphone manufacturer and I've had my NTK for 15 years and the beast is still getting used every day in the studio.
If you're going to be recording drums, the AKG D112 is a popular mic for kick drums. The D112 is also great for recording horns and brass instruments. This mic is primarily best for percussion instruments. I've had good luck using it on a traditional kick drum and congas. I've always found that it provides the right amount of attack and punch to keep the drums right in the mix.
The Shure Beta 52A is another great mic to have in your locker for tracking kick drums. The design is simple, but the results are amazing.
If you're in the market for a USB mic to work on your computer or laptop, there are some really affordable options. One you probably heard of is the Blue Yeti. This little guy has a built in stand and controls for your headphone output directly on the mic. If you need a no-hassle mic to start your recording, this is by far one of the best options. At $129, it's also a very affordable mic that will provide quality audio recordings.
The other options for USB mics are quite vast. You may want to consider the Marantz MPM-1000U or the MPM-2000U mics for a more traditional option. These mics are USB powered and provide a very clean and open sounding audio recording. The 2000 version comes with a shock mount to help with the dissipation of rogue vibrations that may bleed into the mic. Both will provide good quality, so go with the one that fits with your budget. If you can spring the extra $50 for the 2000 model, you will notice the improvemnt in the audio quaility.
There are so many options that it is impossible to keep this post short and still pack in all the details about microphones. If you're considering a mic for your studio, leave a comment below and we'll start up a discussion about it.
Building a Home Studio | Part 2
PC or Mac, this is the ultimate question. If you're unsure of which one to get, you can always get a Mac and install parallels to run both platforms. A PC will ultimately be a little more affordable and have multiple options for a decent DAW.
I have personally had both computers and over the years have settled on a Mac. I started with a G4, then moved to a G5, and now I currently use a Mac Pro. If you're going to run a ProTools HD system, you'll need a computer that can handle PCIe cards. You can buy a chassis to house the PCIe cards, but then that is one more cable and device on your desk.
Be sure to get a computer with a fast processor and at least 8 GB of RAM. The i5 & i7 processors are excellent options for audio production. If you're not quite sure what to choose, call a specialist. I work directly with Joseph Secu at Sweetwater.com (800) 222-4700 x1232.
Also be sure to get a good monitor. With all the mainstream TVs having the ability to connect via HDMI or VGA ports you can have a large selection of monitors to choose from. Being able to see what you're working on is very important. You're going to be staring at this computer screen for hours on end, so it would be a good idea to invest in a screen that doesn't strain your eyes.
Tomorrow we'll cover microphones.
Building a home studio | Part 1
Starting a home studio can be confusing at times. There's so much information on the web that you don't know where to start. Here are a few helpful tips on how to get your studio going.
Start with a budget. Stick to the budget. You're not going to build a world-class studio overnight. It takes time to develop a feel for how a studio operates. Buy affordable gear at first to determine if you have the talent and stamina to run a studio. Running a studio is a full-time job and will consume all of your free time. So it's best not to invest all your money into the studio up front.
Get a decent interface. One that has a few mic preamps and some routing options. As you grow, you can upgrade your interface. There are so many options, but you can find used Digidesign 192 HD interfaces on eBay for about $500. Start with one of these if you can afford the system setup. If you're on a tighter budget, I recommend an interface that has been modified by Black Lion Audio. They offer superior A/D conversion and at a price that won't break the bank.
This will be the core of your studio, so spend a little bit of time researching what will work best for you. A good computer is also vital and there are many PC & Mac options. We'll get into that tomorrow.
Internship Dos and Don'ts
I respond to internship requests on a daily basis. Many of the requests are one-sided and offer no benefit to the studio. Here's the deal, an internship is beneficial to both the studio and the intern. If you want to intern at a studio, you have to possess some sort of value to the progress of the studio. The studio is going to give you experience and education so you can be a competent member of the industry. If you have nothing to give back, you'll never get an internship.
Before you go and start pestering studios, you need to do a little prep work. Start with reading a few books on Pro Tools and recording principles. You can read books on many different topics and learn quite a bit about the industry at your own pace. Educating yourself adds so much worth to your assistance in the studio. Once you know the difference between XLR & AES cables, you will move quickly through patching and studio setup.
Buy some gear and do some home recordings. Get a little bit of experience with using a DAW and play around with the settings. If you want to learn Pro Tools, go to www.avid.com and sign up to receive Pro Tools First. It's a free version of Pro Tools that will get you started. Most professional studios use Pro Tools HD, so there will be a slight learning curve, but getting familiar with the fundamentals is important.
Watch a few videos on YouTube and ask some questions in forums. Do not show up to the studio with a bunch of questions. When you're in the studio, just observe! You're there to learn and the engineer is there to work. If clients are on the studio, keep your yapper shut. If someone asks you a question, answer them, but that should be the only time you speak.
If you do have questions during a session, write them down and save them for after the client's session. It all boils down to manners and common courtesy. You need experience and that is what you should absorb. Being in the room while a session is happening is chalk full of experience. Pay attention to how the engineer conducts the session. Keep track of how many takes are recorded and how they're recorded. When the session is over, start to help with the break down. Ask the musicians if they want help loading their gear. Be helpful and it will be rewarded.
Choosing the right audio engineer
Not all audio engineers are the same. Some specialize in a particular field of audio production. Others focus their skills on a certain genre of music. Choosing the right engineer is a very important part of your album. The right engineer will produce your music and essentially become a member of the band. Without the right engineer, your recordings will fall on deaf ears.
How do you choose the right engineer?
Start by talking to a few different engineers. You can tell a whole lot about a person just by having a simple conversation. Talk about your music and the vision you have for the finished recordings. Talk about things that interest you and find out if you share any common interests. You don't have to be good friends with the engineer, but you should at least get along. You will be spending many hours in the studio with the engineer and you need to make sure that you will be productive. So before you spend hours on end with an engineer working on your music, make sure you can see eye to eye on the vision of the project.
A good way to gauge an engineer's potential is to listen to some of their past recordings and projects. Any professional engineer will have a few examples of their work out on the internet. If you like what you hear, then you will be happy with what the engineer can do for your music. The engineer doesn't necessarily need to be an expert in the genre of music you prefer. Some of the best albums have come from an engineer that specializes in a completely different genre of music. Sometimes a fresh set of ears on the project is the key to success.
Getting the most out of your studio session
Many bands come to Shine On with no prior studio experience, so here are a few tips for using studio time efficiently.
First and most importantly, be prepared to spend time working on recording & mixing. Spending all your time on recording will leave you with unfinished tracks. A good engineer will record decent raw tracks, but they will still need to be mixed. The amount of time it takes to mix a track can vary, but a good rule to follow is at least 1 hour of mixing for each recorded minute. So a 4 minute song can take 4 hours to mix. If you want to get technical about the mix, plan more time. Better to over-estimate than run out of time with half-mixed tracks.
Second, show up on time. Time is the primary factor for how your session moves along. Showing up late to a session is the same as giving away money. Don't expect an engineer to stay late cause you showed up late. It's called an appointment and that means everyone has agreed to meet at a specific time.
Third, make sure your gear is in good condition to record. Tune, replace strings, bring spare everything, and always plan for the worst-case scenario. It doesn't happen often, but I've had sessions where the tubes in the amp burn out. Think of everything because this rolls back to the time factor. Running to Guitar Center in the middle of your session is waste of time and money. Don't expect the studio to put your session on hold while you run errands.
If you plan ahead and prepare for your session, you'll walk away with great recordings that sound professional.
3 ways to avoid ending your music career
Getting excited about your music is a great feeling. Everyday I work with musicians that are motivated and driven to compose and create new music. I see first hand the creative process that goes into the labor intensive tasks of developing ideas into new songs. Many musicians start sending out info on social media while they are still amidst the recoding session in the studio. Some leak videos and audio recordings of the music before the recording session is complete. Though you may be excited and eager to share your excitement with the world, you have to stay focused and maintain a professional attitude. No one will take you seriously unless you have some element of intrigue.
When you prematurely release media and info your image and reputation becomes amateur. My years working with CMJ, Live 105, and Shine On Studio have given me ample opportunity to work with some of the most accomplished and successful musicians in the music industry. Let me share a few ways you can avoid ending your music career.
1. The element of intrigue
It is a good idea to engage your fans and followers on social media, but don't over-saturate your feed with mundane info. If you tell everyone everything you do, then there is no mystery about you. When this happens, people loose interest in what you're doing. Then when you finally have something special to share, it gets over-looked and has no impact on the world. Cut back on talking about yourself and sharing every moment of your life. If you must engage the social media, talk and comment about what other people are doing.
2. Rough drafts are not public
When you leave the studio with rough draft mixes, take them home and review them. That is the purpose of a rough draft! These mixes should not be posted on your website or social media. When you release unfinished work, your reputation and image are permanently scarred. Listeners don't care that you label the track "rough mix" or that you will be making changes to the mix later. They just absorb what they hear and immediately decide if they will follow or forget you...forever. You should always strive to put your best work forward and impress the world with your musical talent. First impressions are vital to success in the overcrowded modern music industry. Wait for the final mix to be finished and then release all of the tracks at one time for the best impression you can make on the music community.
3. Keep you personal & professional lives separate
As an entertainer, you must constantly entertain. Sharing your personal life with the public does not bode well for your professional career. The moment that the public does not view you as a unique individual in the entertainment industry is the moment when you lose all credibility. You must stay focused and keep all your public interactions on a high level of professionalism. Separate your social media and keep your personal life private for your friends and family. The public likes entertaining distractions, so be their entertainment with your music.
These few guidelines can lead to the foundation of a successful or unsuccessful music career. It takes a great deal of effort to maintain a professional music career. Think about what you do before you actually do it. Ask your friends and family for feedback before you present yourself to the world. Hire a producer that you respect or that has a good reputation. Hire a manager or a publicist to maintain your public image. These are things that professional musicians do and they are successful. You get out of it what you put into it, so be aware of what you're putting in.
Mixing Vocals | Adding Distortion & Lo-Fi
Vocal distortion can be the glue that pulls your vocal tracks together. Just a simple side-chain with the vocals being processed through a distortion plugin or amp head can pull the vocals coward in the mix and at the same time find the right pocket for the vocals in the mix. You may be saying to yourself, "I don't want my vocals all fuzzy and gritty." Not to worry, by side-chaining the effect, you can blend in the dry and wet vocal signals to a level that works best for your mix. The distortion will add just enough color to the vocals so they feel like part of the music and not just ambiguously floating above the music. Slap some EQ on the distortion track to get a brighter or darker tone to your distortion coloring. Just don't go overboard with the vocal effects, unless that is the goal for the track. Happy mixing!
Mixing without plugins
How many of your mixes have plugins strewn across each and every channel? I'm going to guess almost all of them or at least a good portion of them. Are you relying on the plugins to make your recordings sound better? Have you ever tried to mix with just panning and volume adjustments?
Today's modern engineer has become too dependent on digital enhancements of recordings. Things like proper mic placement and quality mic preamps have been replaced with software that constantly needs to be upgraded. Thus, music is loosing the ambiance and mood of the performance that was captured in the studio. Lush layering techniques are being replaced with copy & paste keyboard commands.
I pose this challenge to all engineers that are mixing with a DAW; make a rough mix of your recordings with no plugins just so you can hear the naked truth about your mics, mic placement, and room reflections. Mastering what mic to use and where to place it to capture the best sound will exalt your recordings to unparalleled quality. Musicians will flock to you once you've learned how to capture the purity of sound and translate it in to timeless recordings. If you are using plugins like training wheels on a bike, it's time to grow up and learn how to balance your mixes with knowledge and experience.
Recording | Guitars

Recently recorded a project that had some heavy guitar riffs. The guitarist wanted to get that overdriven tone, but still retain clarity. This is always a challenge for any engineer. Mic choice and placement are crucial. Amp volume rears its ugly head in your face and can create a nightmare for you in the mix. Here's how I did it without spending a lot of time trying to get just the right take in one shot.
Setup a few mics in front of the cab. I like to use a Shure SM57, Shure SM7B, Sennheiser e606, and Sennheiser 421. Put one in front of each cone slightly off-axis and pointing away from each other. Then run the guitar to a DI for tracking the clean signal and then thru to the amp head. Based on how many mics you setup + the DI, you'll have a decent amount of tracks to work with. Normally, I don't use all the tracks, plus there can be phasing issues. All I need is one good track from the take and we're golden.
The first take should be at the level of overdriven tone that the guitarist prefers. Then reamp the clean signal with the amp at a slightly lower volume. This should give you more clarity from the performance. You can keep doing this routine until you get enough layers to blend in the desired sound for the guitar tone. Pan out the different takes and adjust volume levels to widen the mix.
This is just the concept. You'll need to experiment with your setup to find out what works best.
Recording | Drum Setup
Tracking drums is an art form that takes years to get right. There is a lot of trial and error, so get used to disappointment. You have to really grasp your mics, gear, and room. That said, there's one major problem with tracking drums. The drummer keeps changing. Not all drummers can be good studio drummers, so here's a few tips on making sure you get good drum tracks on your recordings.
First, studio drumming is not the same as live performance drumming. When you have microphones all around your kit, it does take a little finesse to get good takes.
Second, the drum setup is completely different in the studio. There needs to be separation between the high hat / cymbals and the toms. This means that the cymbals need to be raised up higher so they're not in the same plane as the drum heads. You may not agree with me, but your album will be all washed out.
Third, microphone placement is crucial! This one I can't stress enough. If you have a tom, a cymbal, or whatever the hell is on your kit and you only hit it once, get it out of there. That can be overdubbed later and does not need to take up real estate that the mics need.
These are just the foundation for a good drum setup in the studio. Leave comments or questions if you want to hear me rant some more.
Black Lion Audio Signature 002 Mod

There are certain things that contribute to a great recording. The first is the interface that you're using. You can go and spend some $$$ on a HD converter and get great results. However, there is an alternative for great sound at a more affordable price. Black Lion Audio (www.blacklionaudio.com) is a company based in Chicago and they have some modifications that rival some of the big expensive converters. For under $2,000 you can get the BLA Signature Mod on your 002 or 003 rack. We currently have one that is used as our mobile rig and it holds up quite well. Many of the live recording that Shine On has been hired to record have been tracked with our modified 002r.
The Signature Mod will improve your converters, clock, and mic pres. These are huge improvements over the Digidesign stock interface. They also beef up the headphone amp to provide a more accurate monitoring option. The A/B recordings we did with the interface are jaw-dropping. There really is no comparison between the recordings. The mod improved the attack of transients and the depth of the EQ range. Drums have more punch, guitars roar and scream with more intensity, bass is bigger and richer in the low end, and vocals just rip through the mix to sit right in the pocket. These improvements are well worth the investment. You'll save time in the studio and your mixes will have a brilliance that just cannot be matched at this price point. If you'd like to get more info or experience with the interface, sign up for one of our Pro Tools lessons and an engineer will show you the ins and outs of this impressive upgrade to your studio.
Recording | Pro VO tracking
Voice over work can be very profitable and provide steady income. You just need one thing, a professional sound. Some recordings are just superior to others and it boils down to the talent and how the talent is recorded. Imagine just reading out loud for the rest of your professional career. At Shine On Studio, I produce some of the highest quality vocal recordings heard around the world. If you have a critical VO recording that needs to sound extremely professional, you've found your new recording studio.
My equipment and mic selection offers a wide range of presence and tone that will compliment any voice actor's project. I've worked with professional commercial productions for Television, Video Games, Theatrical Releases, Company Promotions, Educational Documentaries, Audio Books, Instructional DVDs, TV commercials, Radio commercials, and Private Interviews. I provide direction and vocal coaching to help clients get the right performance recorded to impress their employers.
Come by the studio for a tour and hear some of the quality production that has been produced at Shine On Studio. You've got the talent and I've got the experience to get the job done right. Professional sound for professional voice actors.